

- The exam organiser name participants will see
- The link (URL) that opens the participant login page
- Whether participants may log in with Google or create their own account
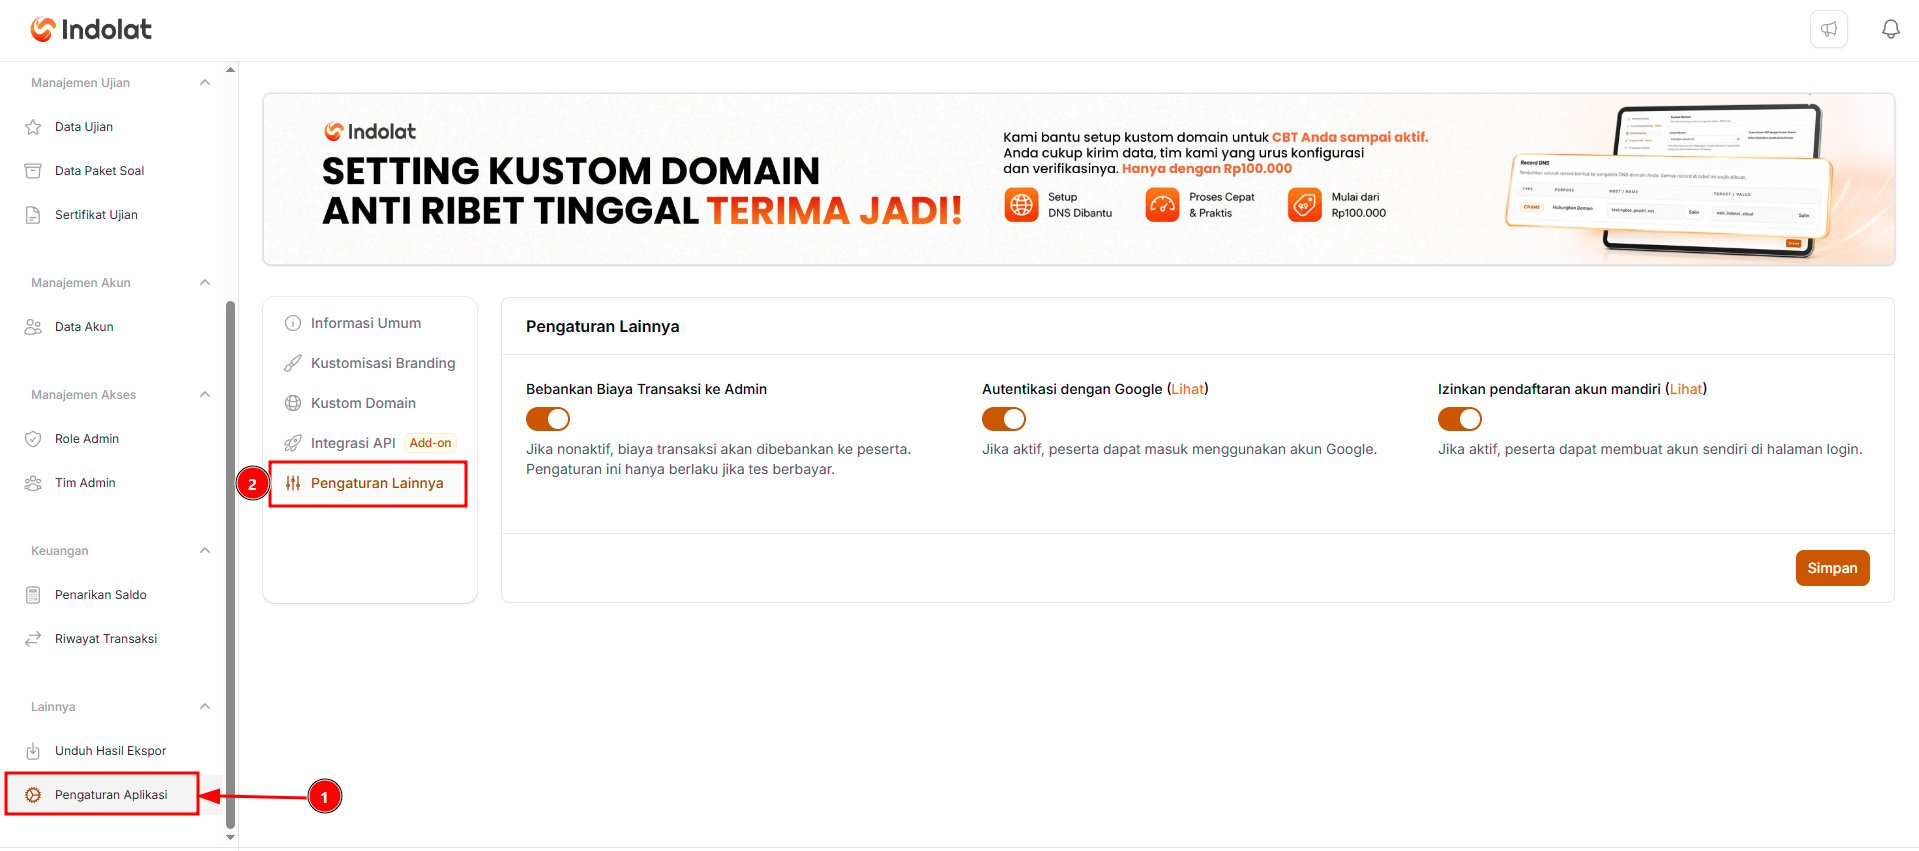
These settings are in the Application Settings menu.
SNBT 2027 Grand TryoutTo let participants open the login page, you first need to set up the CBT system address. You can then share that link on WhatsApp, social media or any other channel.
1. Set Up the CBT System’s General Information
1
Open Application Settings, then select General Information
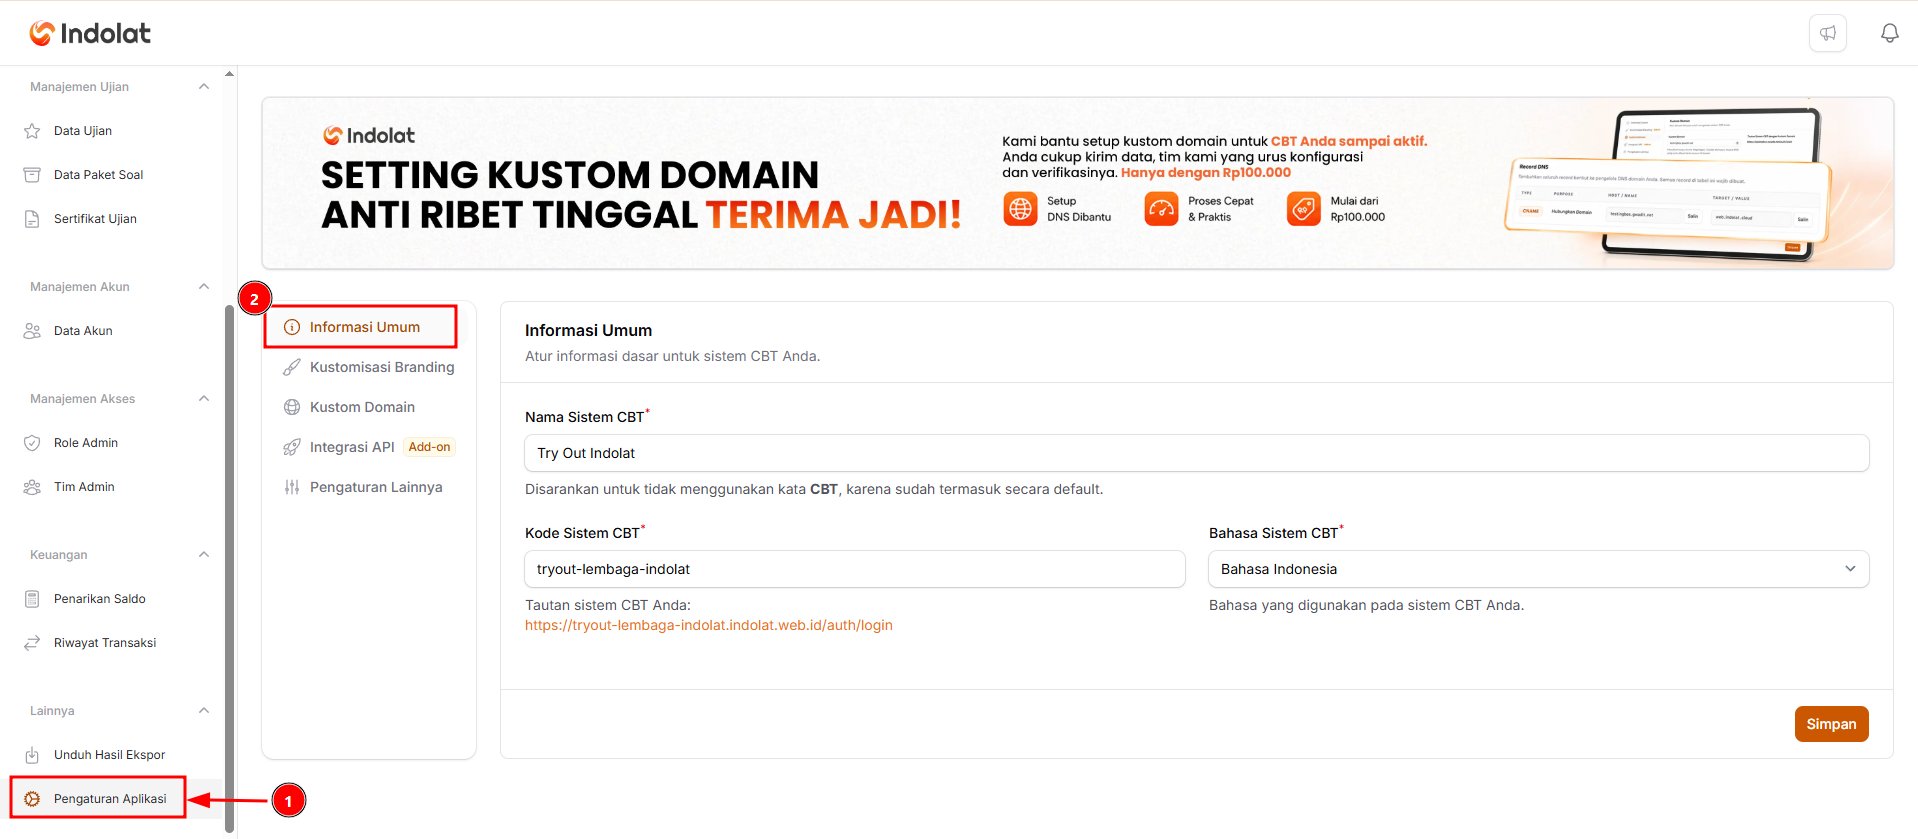
Here you can set the name, website address and language that participants will see.
2
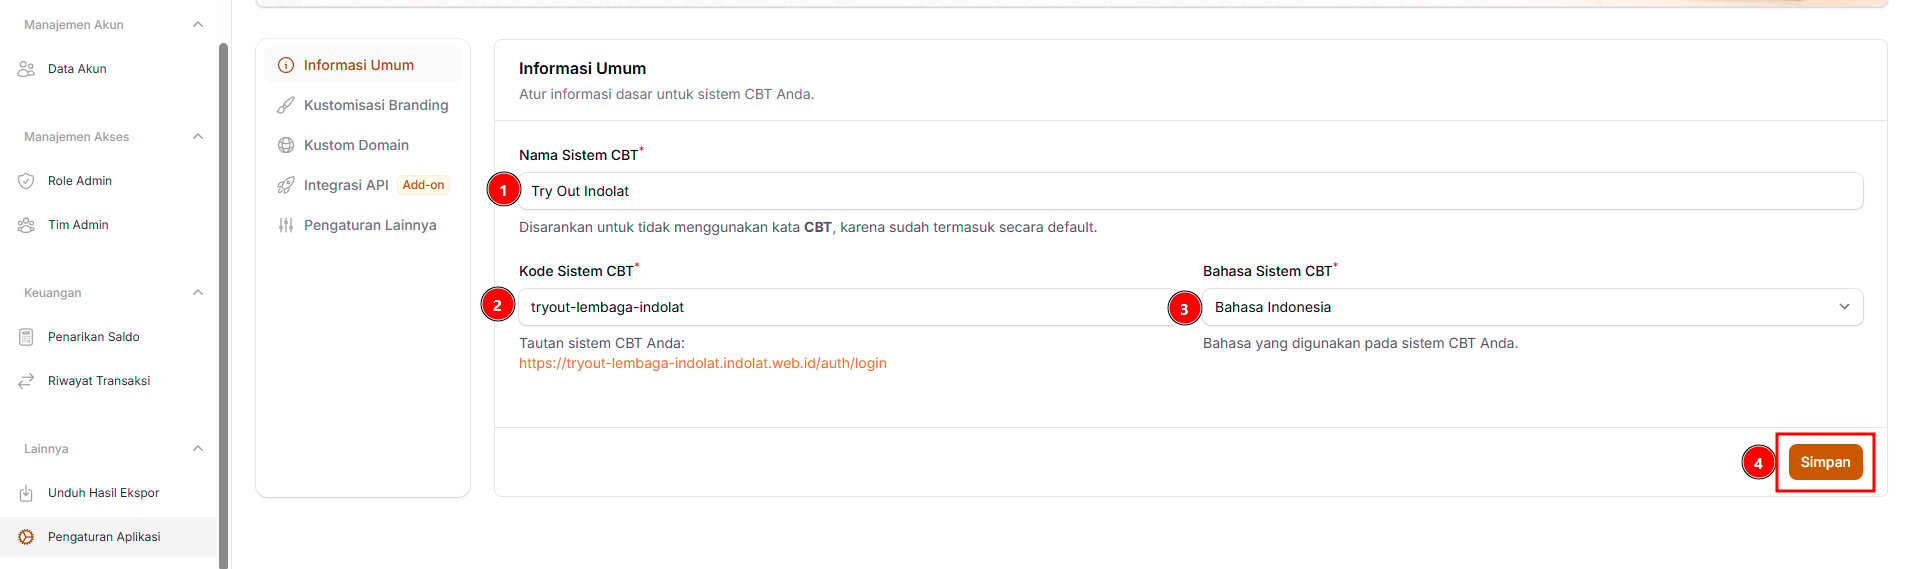
Enter the Basic Information for Your CBT System
-
CBT System Name
Enter the institution name shown on the participant pages, without the word CBT. The system adds it automatically, for example CBT Try Out Indolat.
Example: Try Out Indolat Here is how the CBT System Name looks to participants: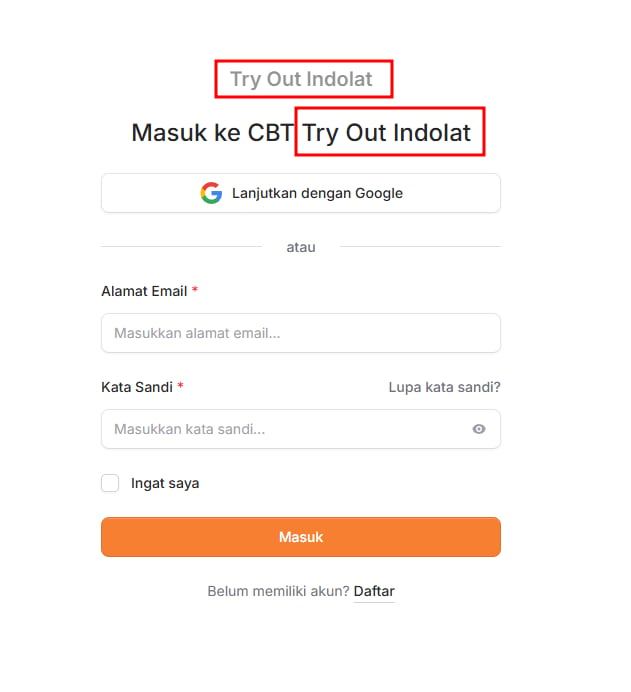
-
CBT System Code
Enter a short code that becomes your CBT system’s web address. Use lowercase letters, numbers or hyphens (-), at least 4 characters, and a code no other system already uses.
Example:tryout-lembaga-indolatOnce the code is saved, the system creates a login link like this:
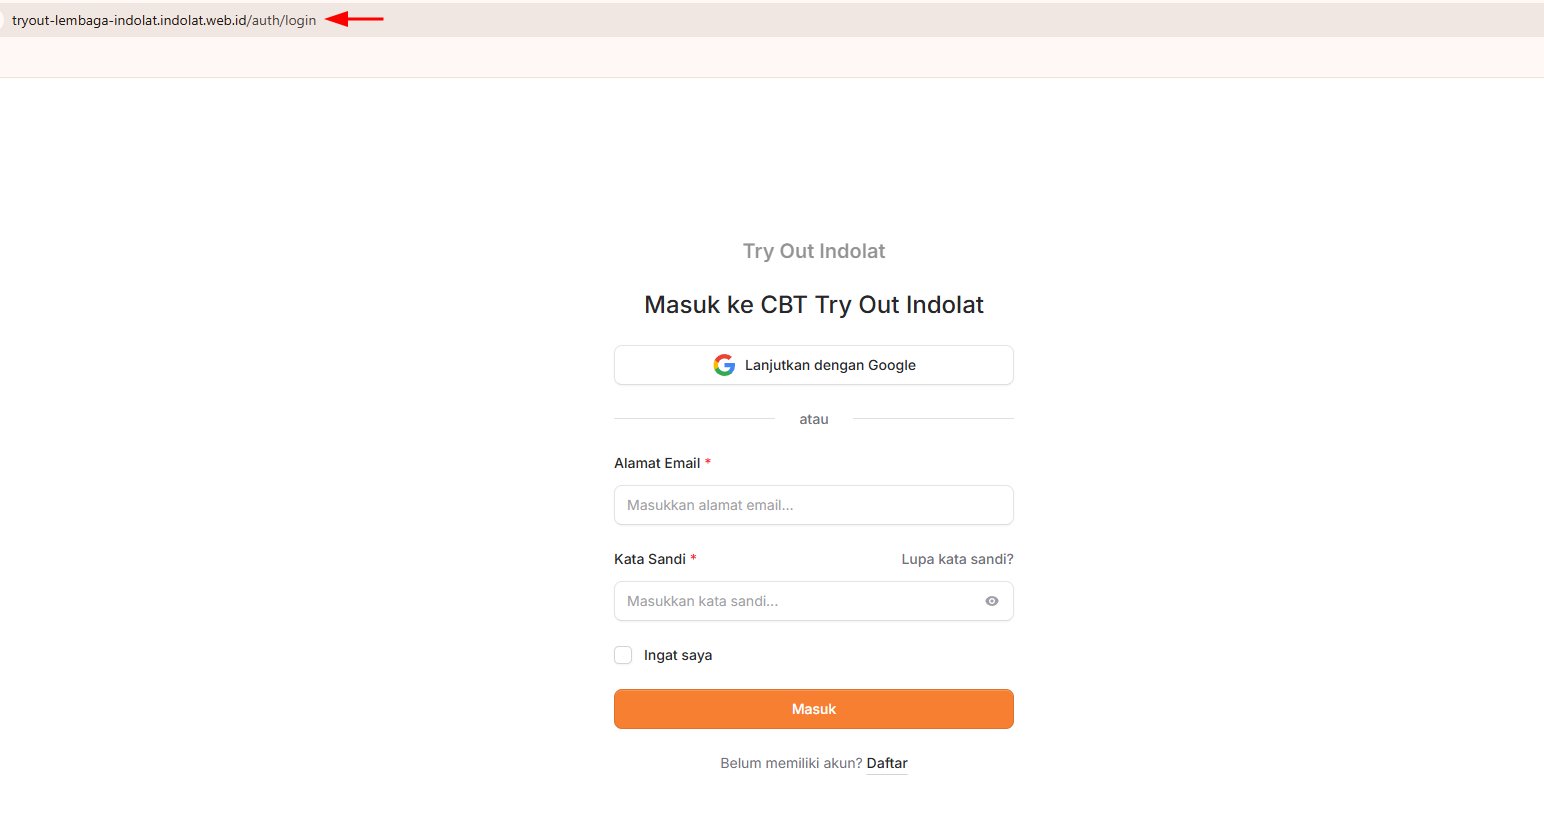
This is the address participants open to log in to the CBT system.https://tryout-lembaga-indolat.indolat.web.id/auth/login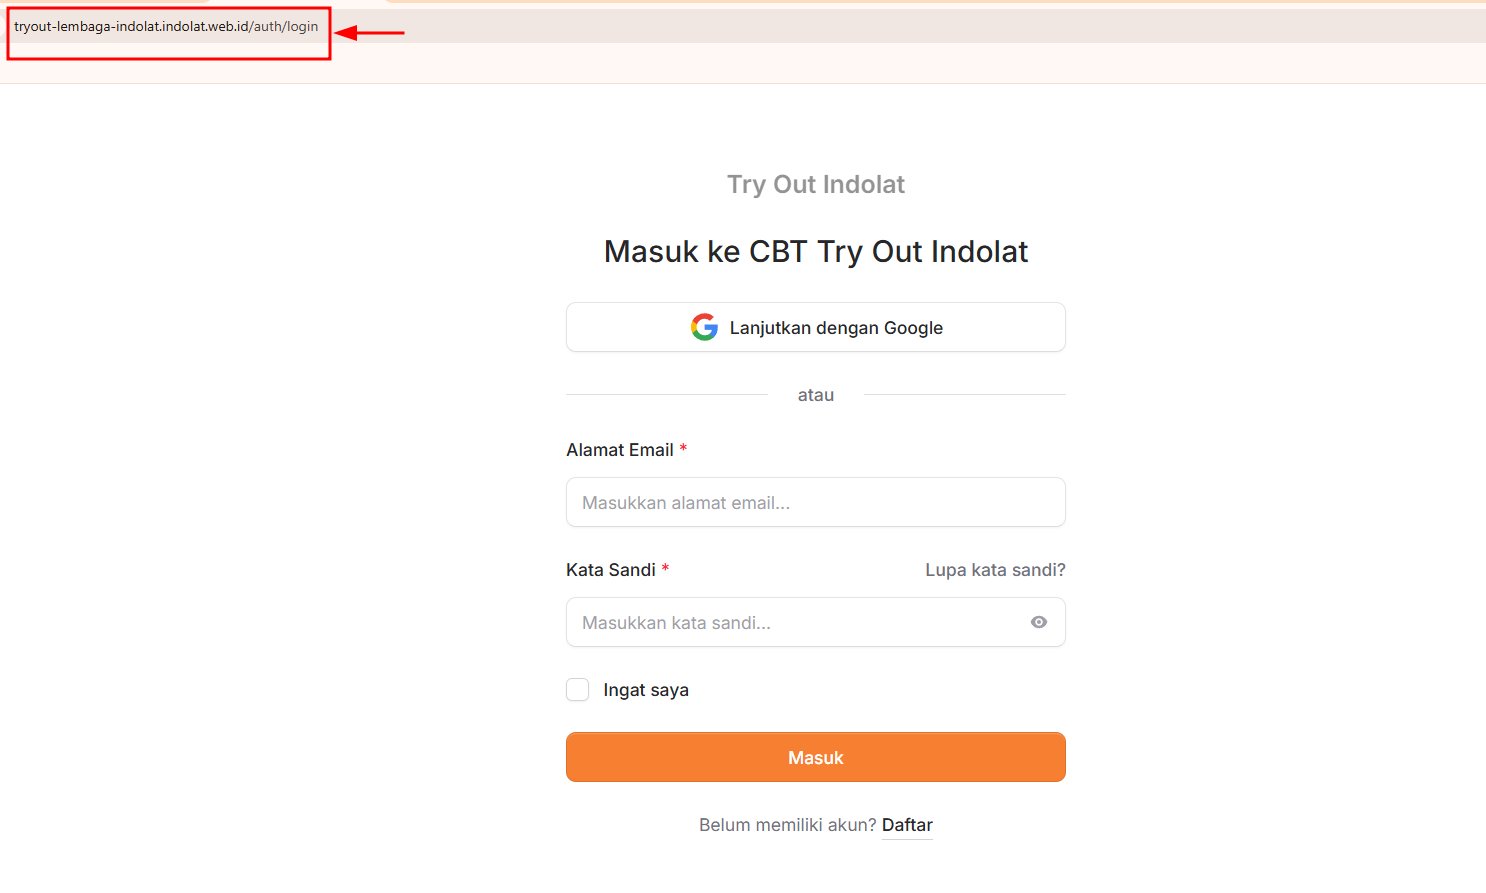
-
CBT System Language
Choose the language used in the system interface.
Example: Bahasa Indonesia
3
Click Save
Once you have checked all the information, click Save.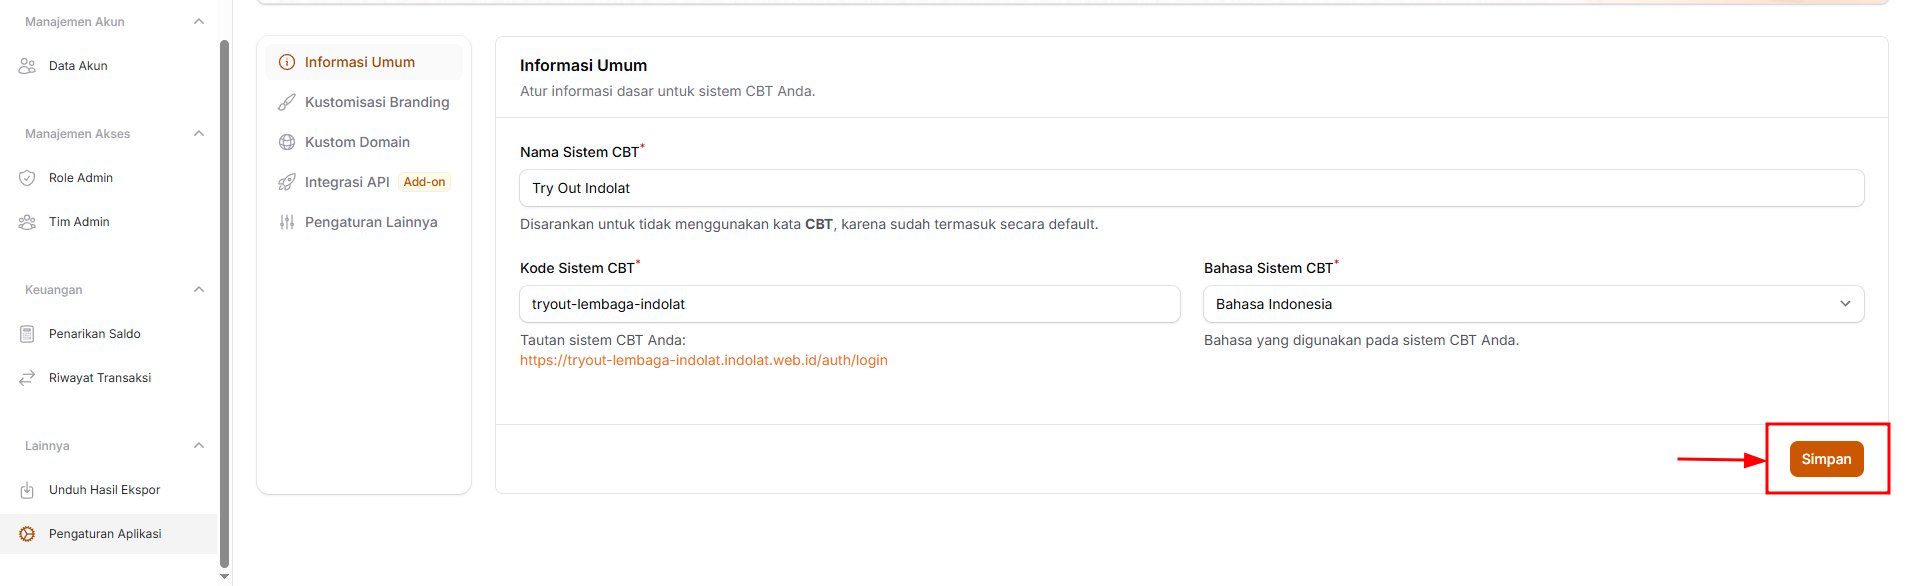
2. Set How Participants Create an Account
In this section, you choose which login options are available to participants and who pays the transaction fee for exam payments.1
Open Application Settings, then select Other Settings
2
Choose Who Pays the Transaction Fee (Optional)
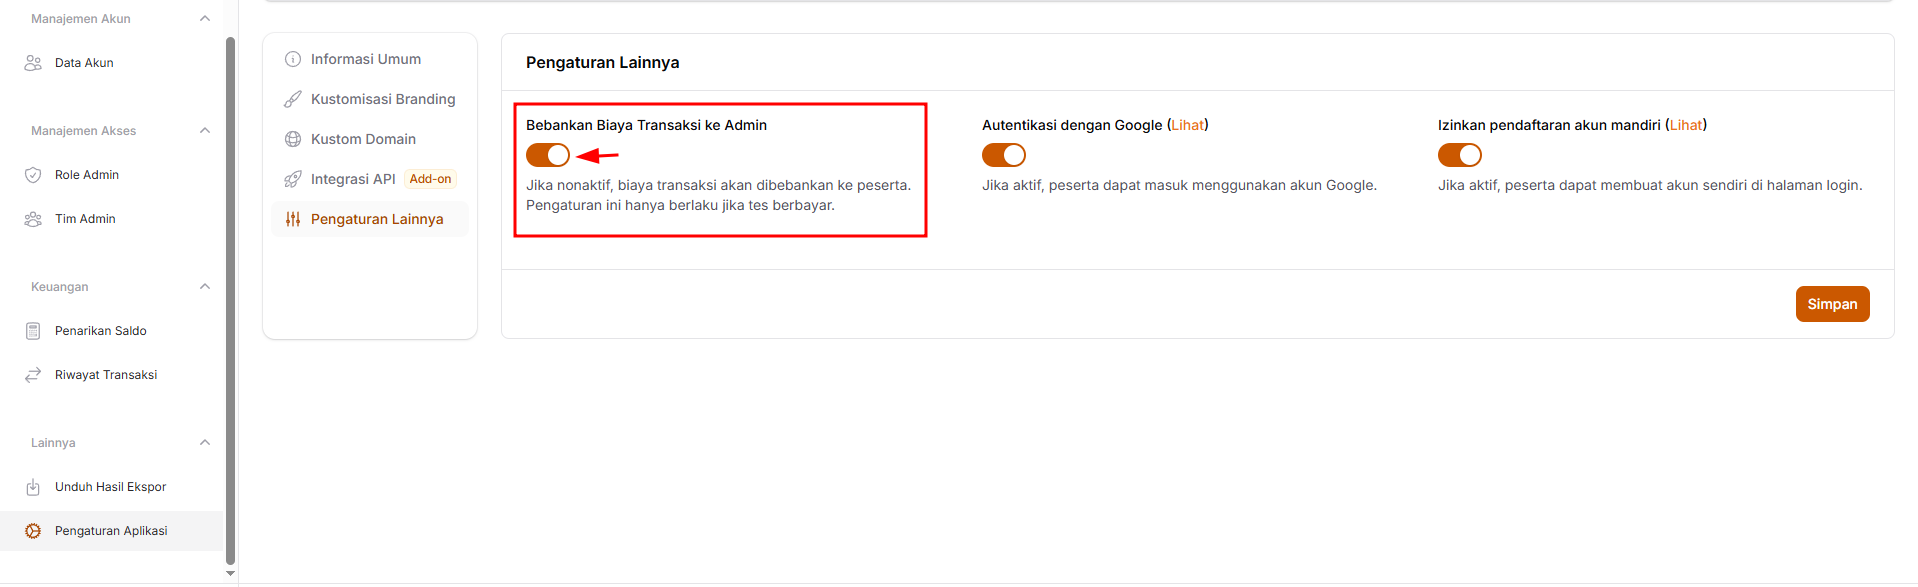
- Turn this option on if you, as the organiser, want to cover the admin fee for payment transactions.
- If it is turned off, the transaction admin fee is added to the participant’s bill.
- The participant pays Rp50,000
- The Rp2,000 transaction fee is deducted from the payment
- The admin receives Rp48,000
- The participant pays Rp52,000
- This is the Rp50,000 exam fee plus the Rp2,000 transaction fee
- The admin still receives Rp50,000

3
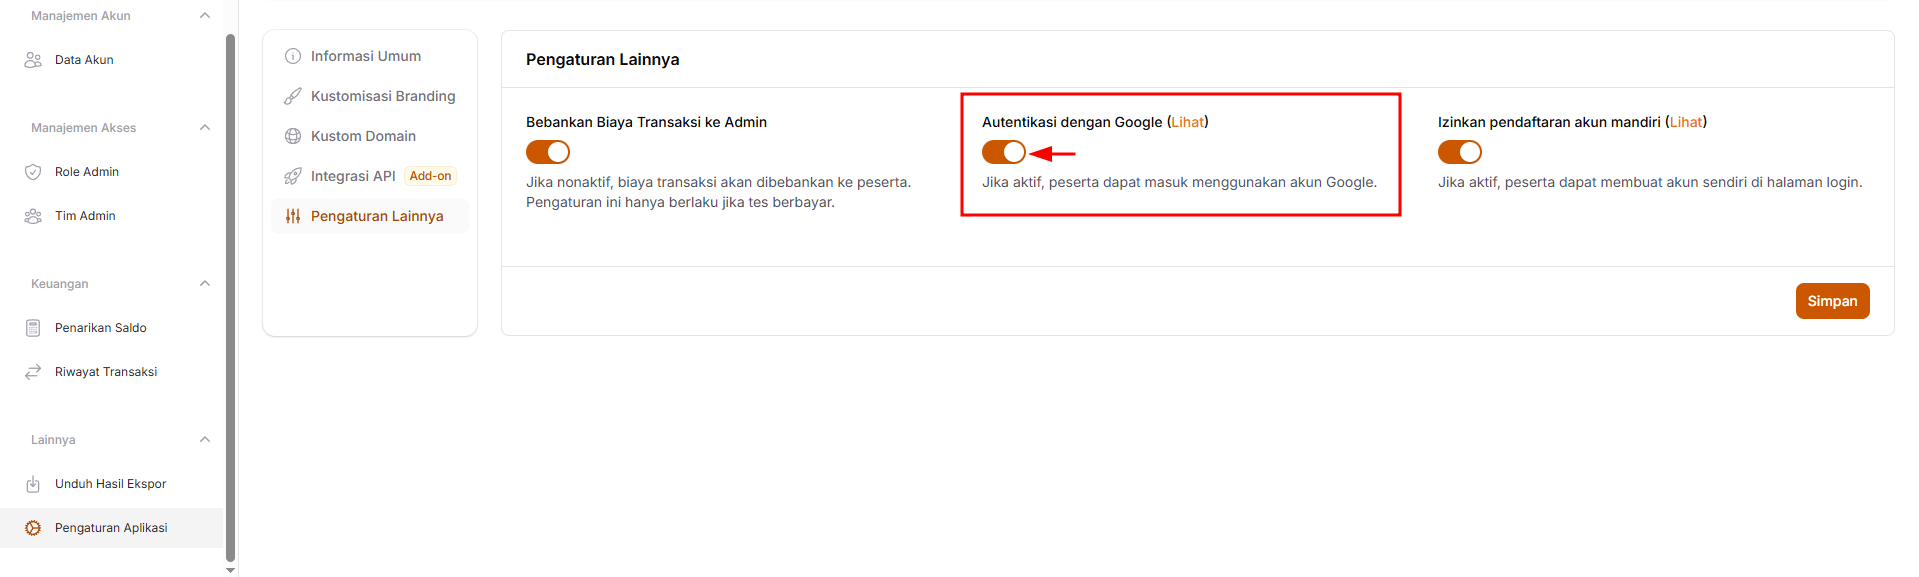
Configure Authenticate with Google (Optional)
-
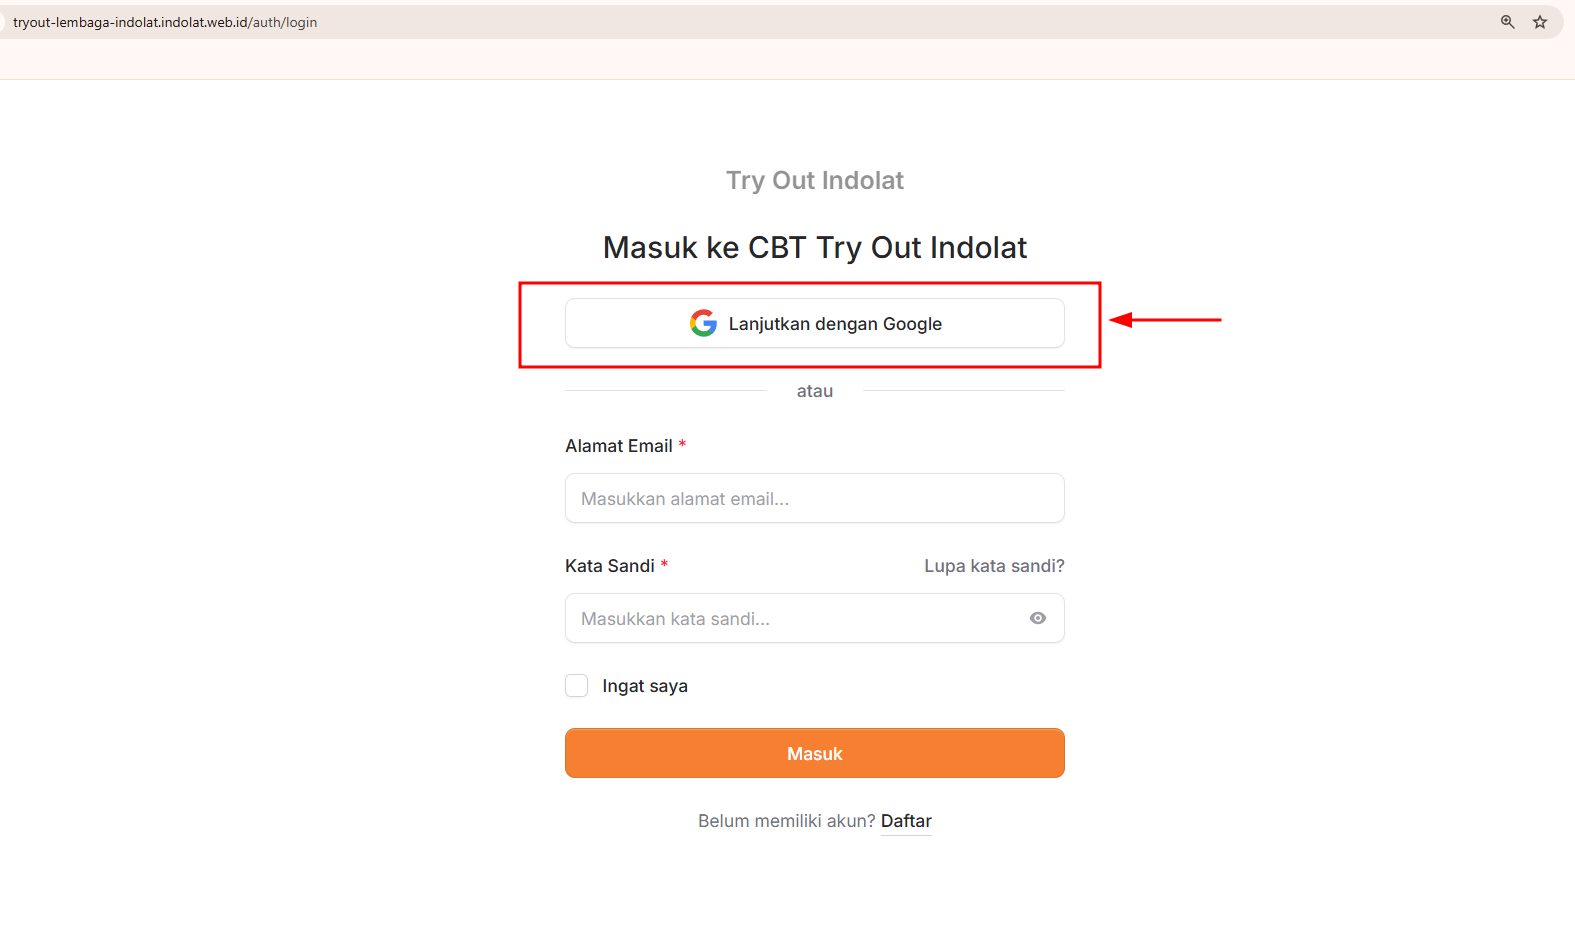
Turn this option on if participants may log in with an existing Google or Gmail account. Once it is on, the Continue with Google button appears on the participant login page.
-
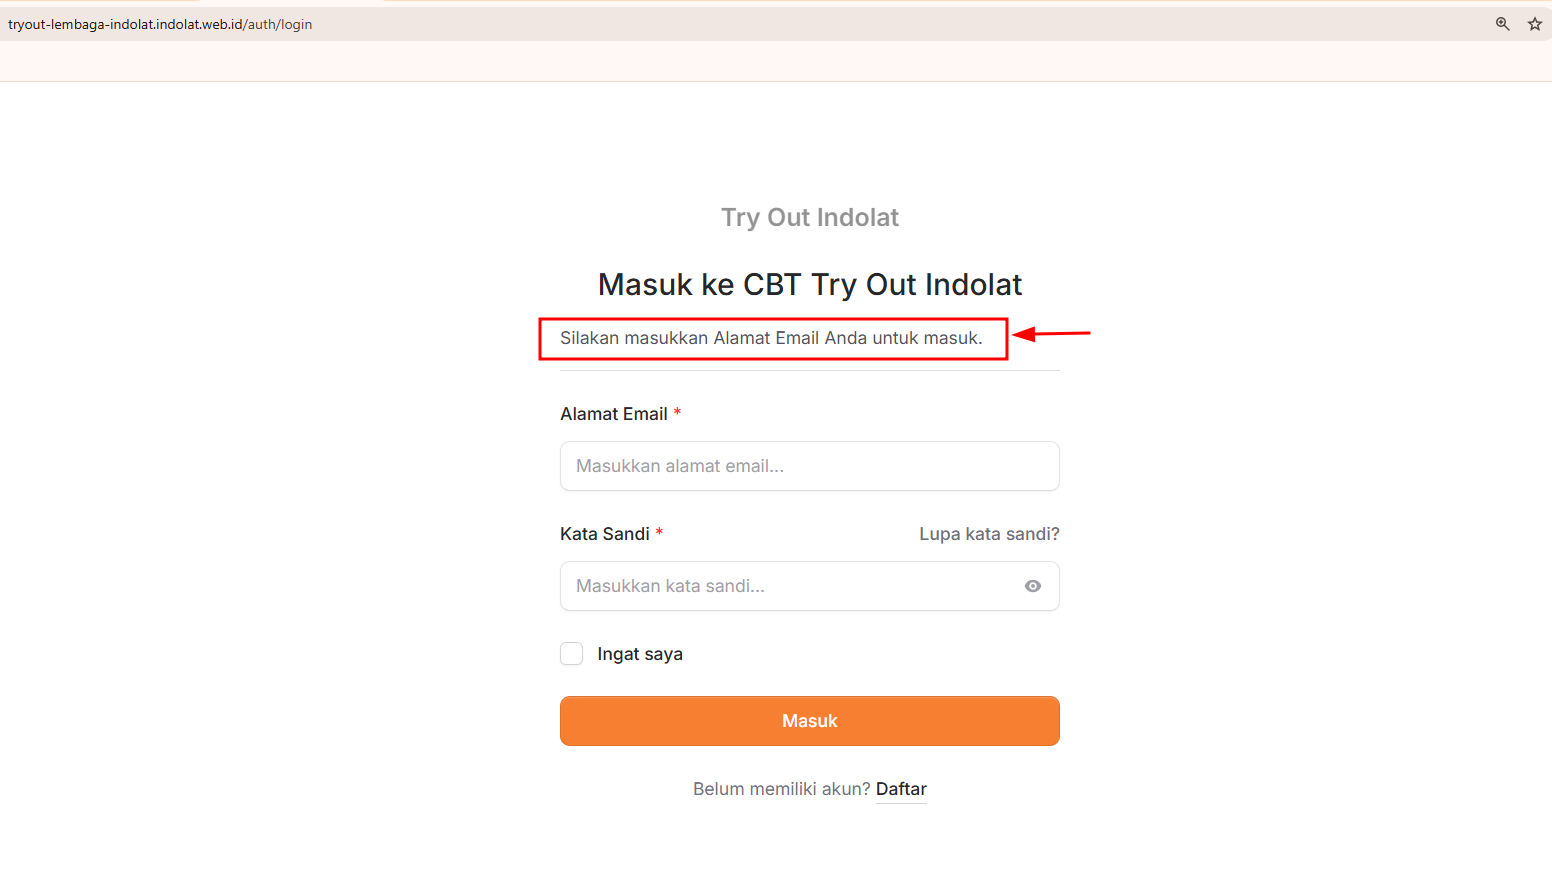
If it is turned off, the Continue with Google button does not appear on the participant login page.
4
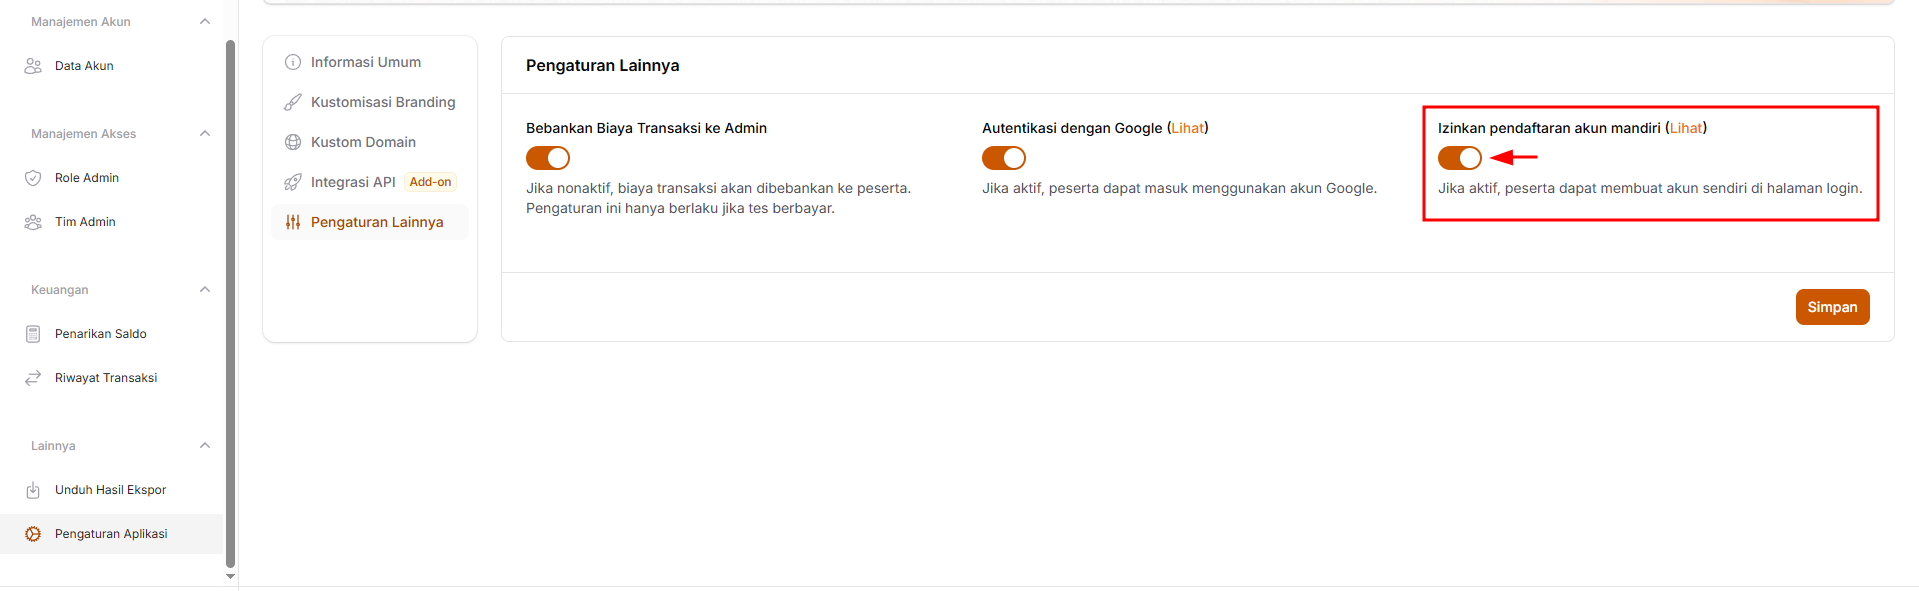
Allow Self-Service Account Registration (Optional)
-
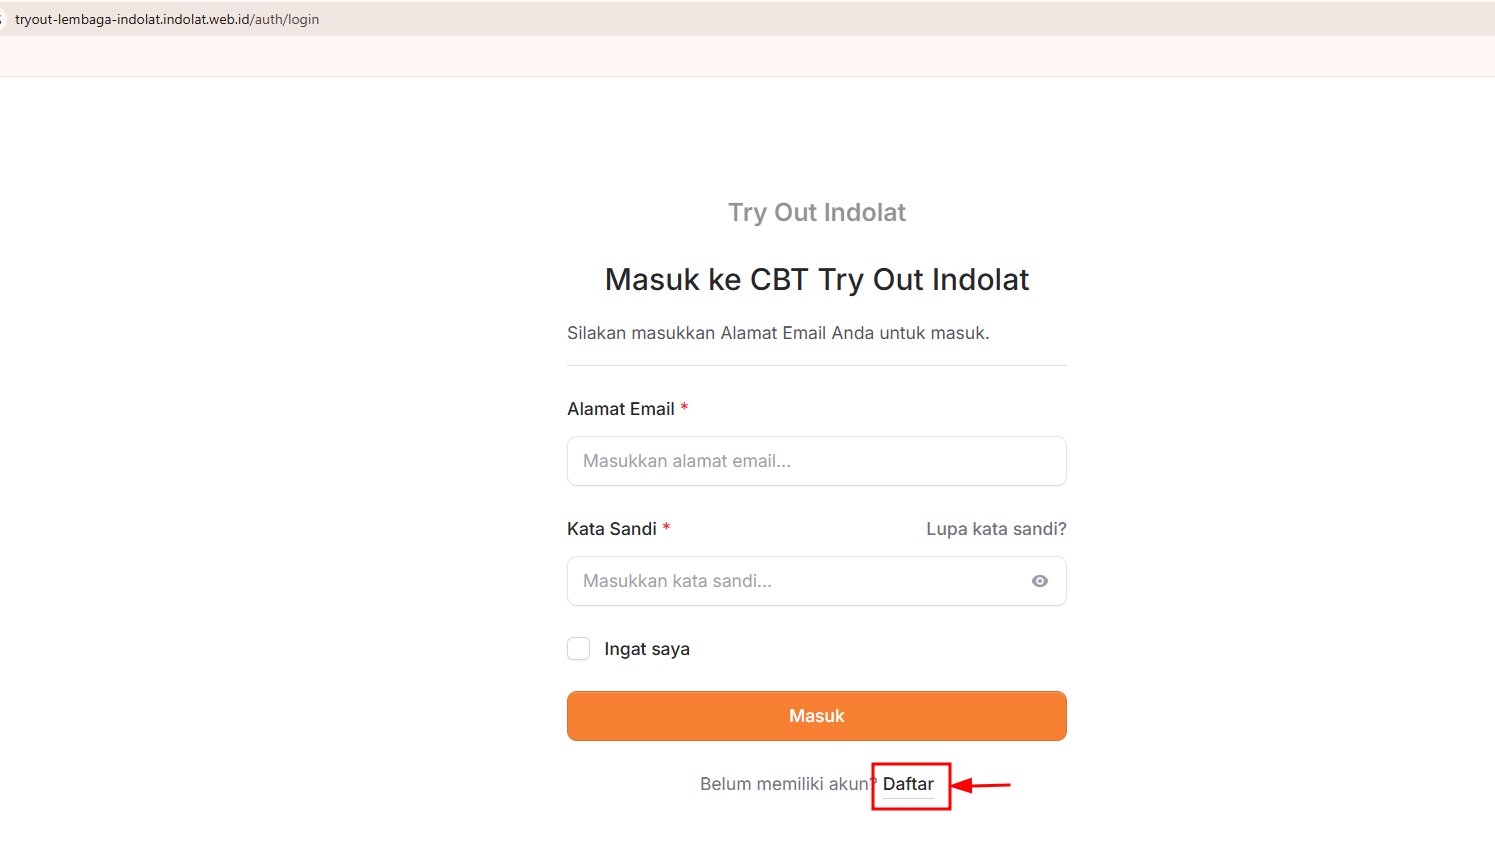
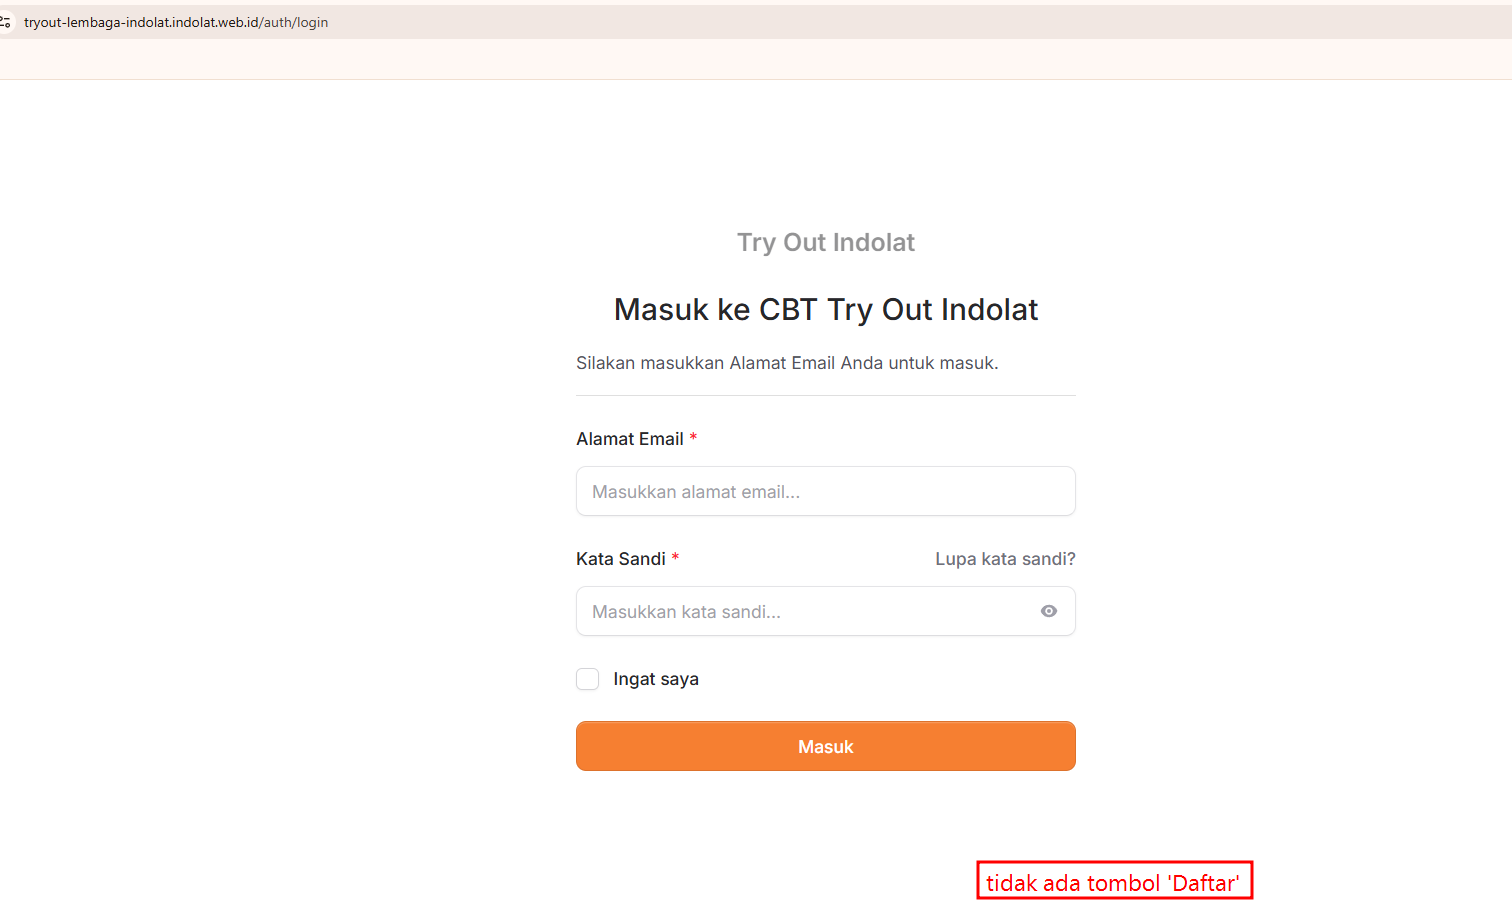
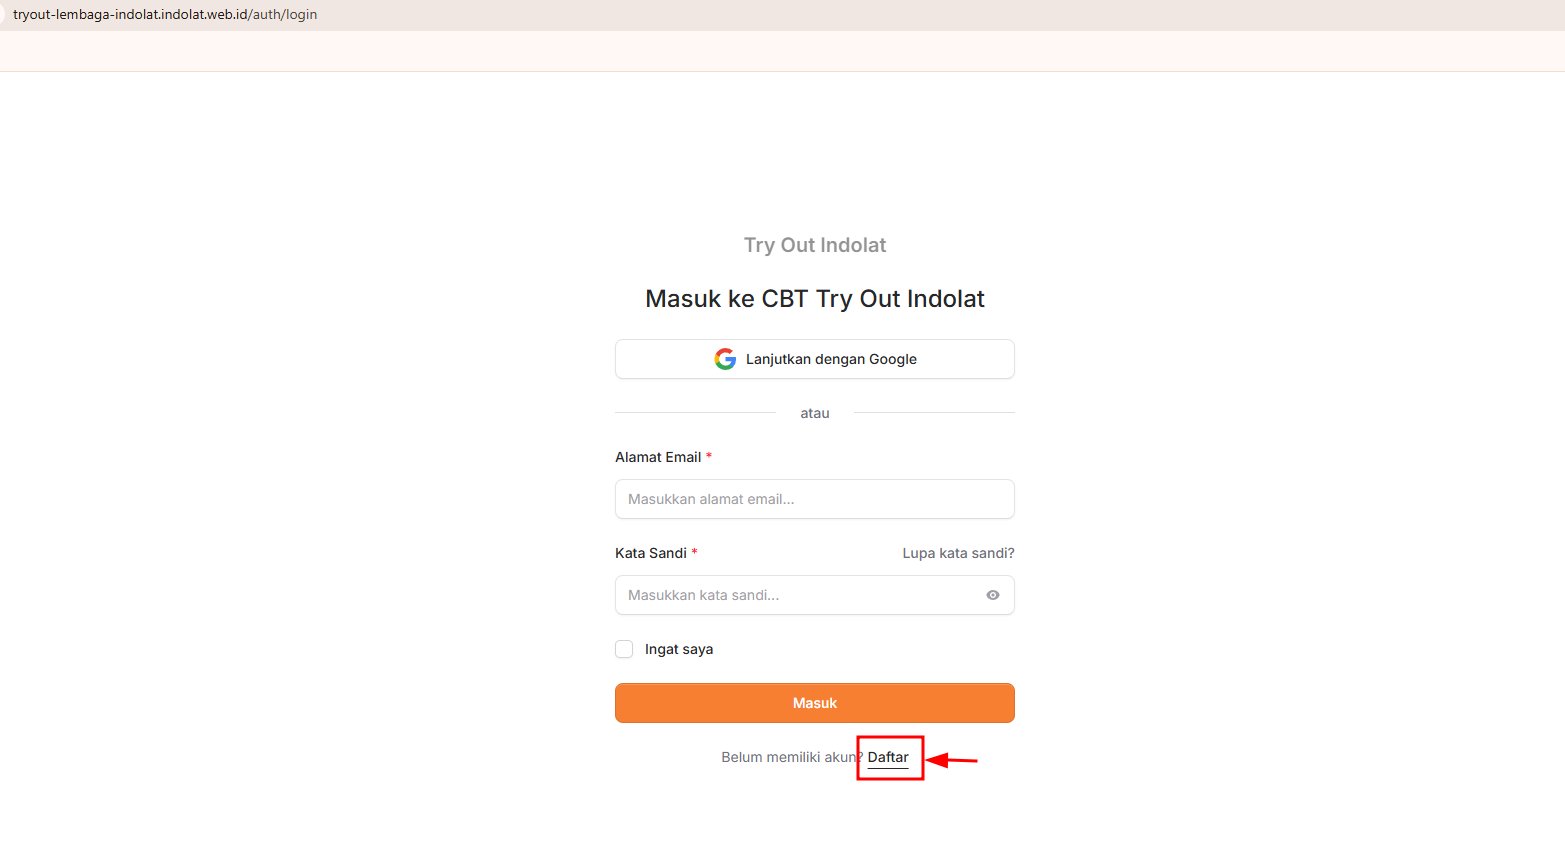
Turn this option on if participants may create their own account from the login page. Once it is on, the Register button appears on the participant login page.
-
If it is turned off, participants can only log in with accounts the admin has prepared.
5
Click Save
Once everything is set as you want, click Save.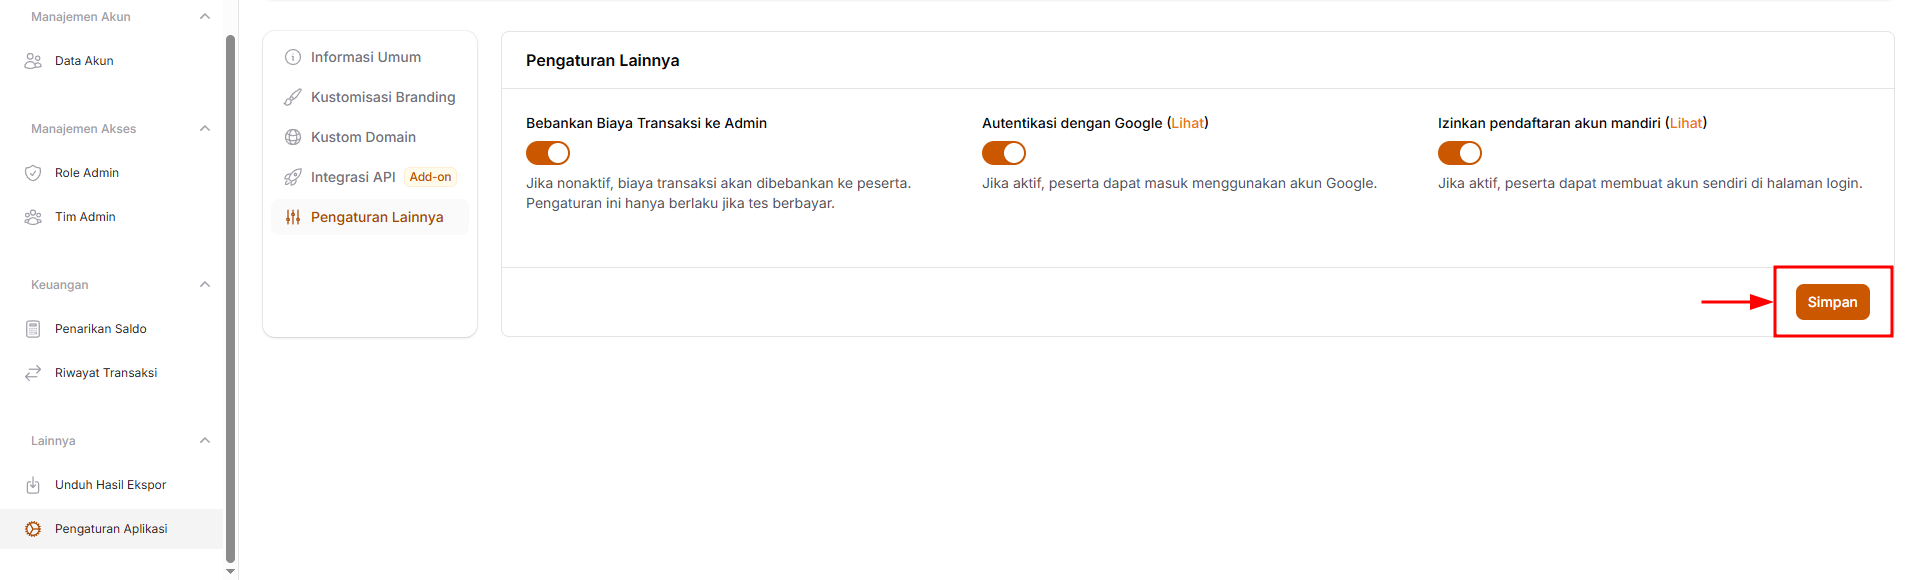
3. How Participants Log In
1
The Participant Opens the Exam Link
2
Click Register
3
The Participant Fills In Their Account Details
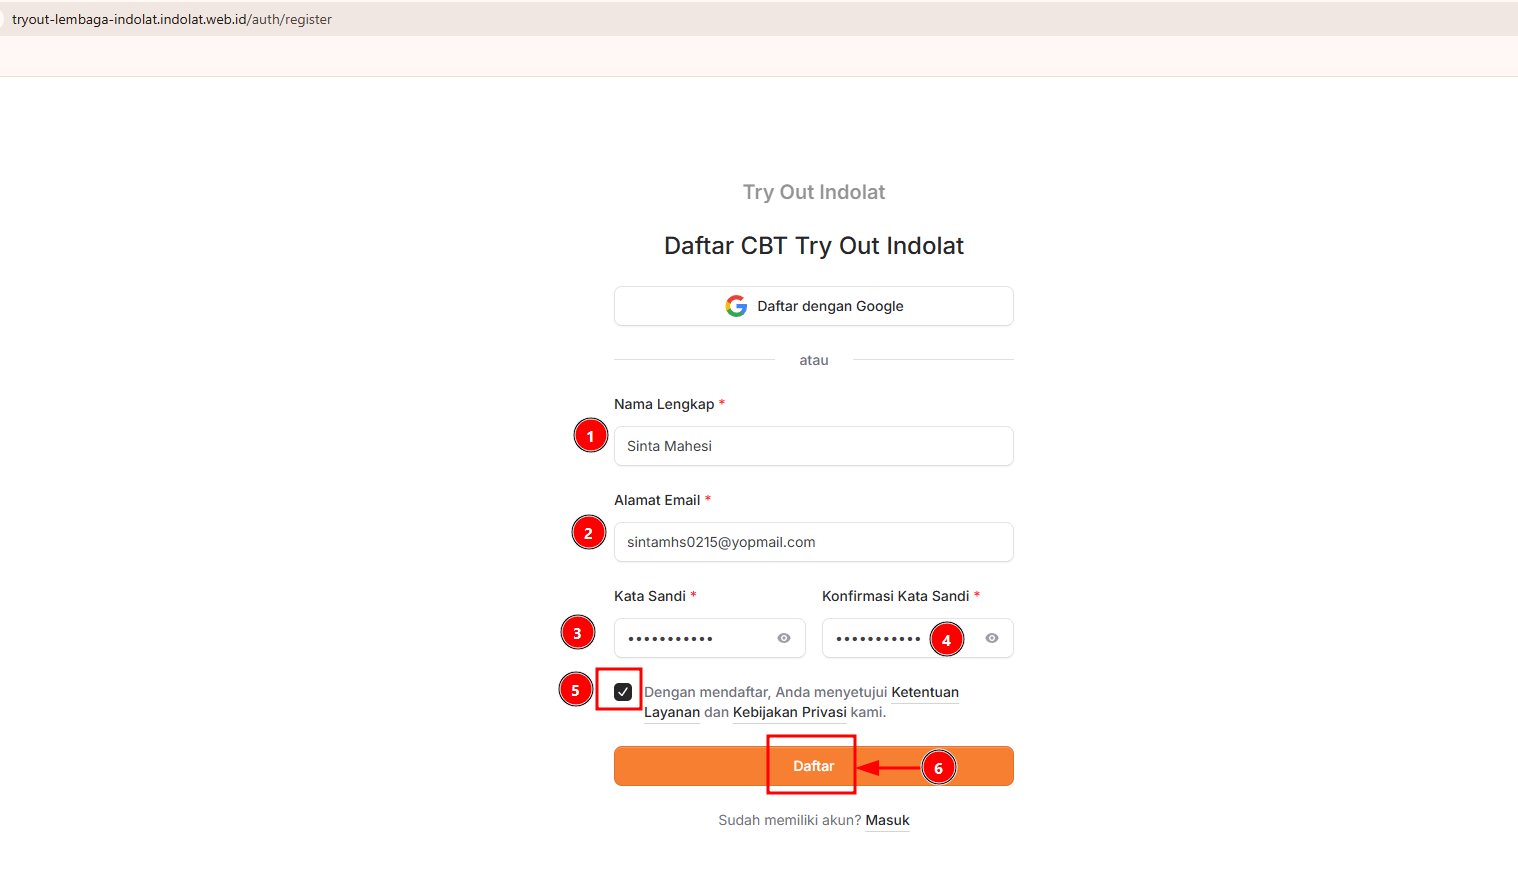
- Full Name
Enter the participant’s name as it will be used in the system. - Email Address
Enter an email address that is still in use. The system sends the verification code to this address. - Password
Create a password that is easy to remember but hard for others to guess. - Confirm Password
Enter the same password again to make sure there are no typos. - Agreement to the Terms of Service and Privacy Policy
Tick this box to confirm that the participant has read and agrees to the terms. - Register
Once everything is filled in, click Register to create the account.
4
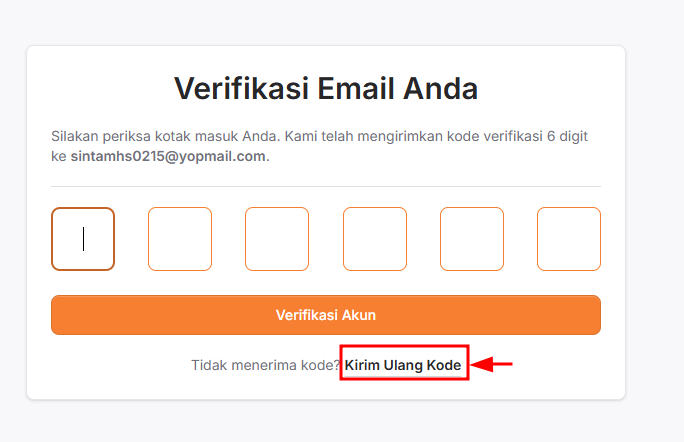
The Participant Verifies Their Email
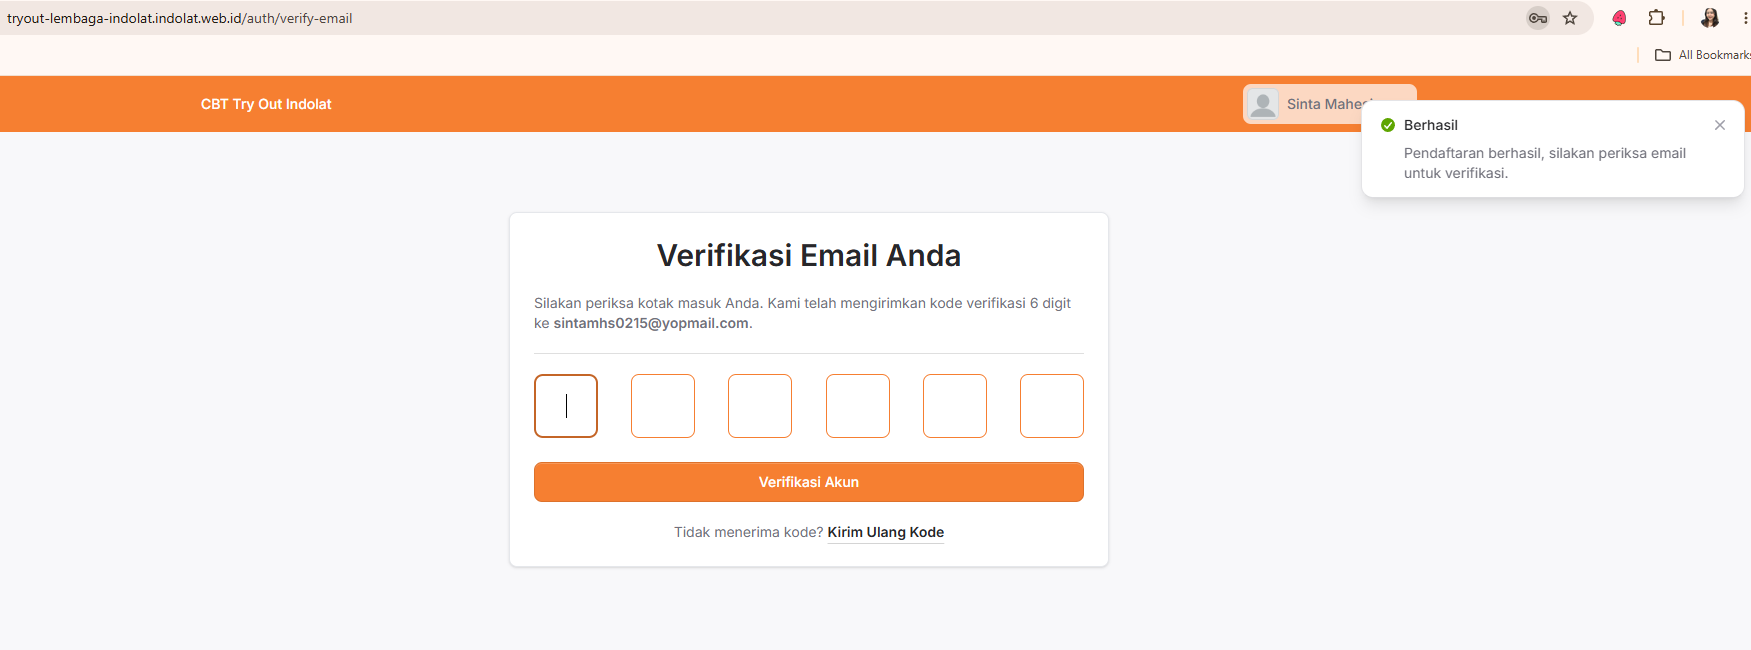
sintamhs0215@yopmail.com.What the participant needs to do:- Open the inbox of the registered email address.
- Look for the email from CBT Indolat.
- Copy the 6-digit verification code.
- Enter the code on the verification page.
- Click Verify Account.
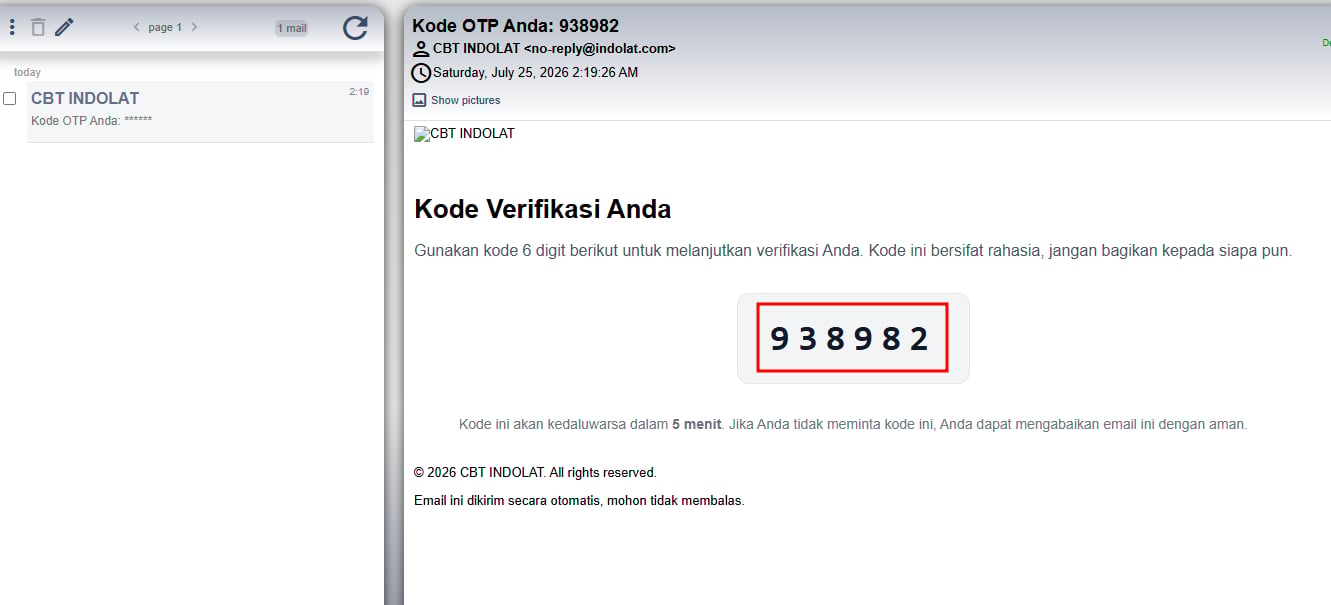
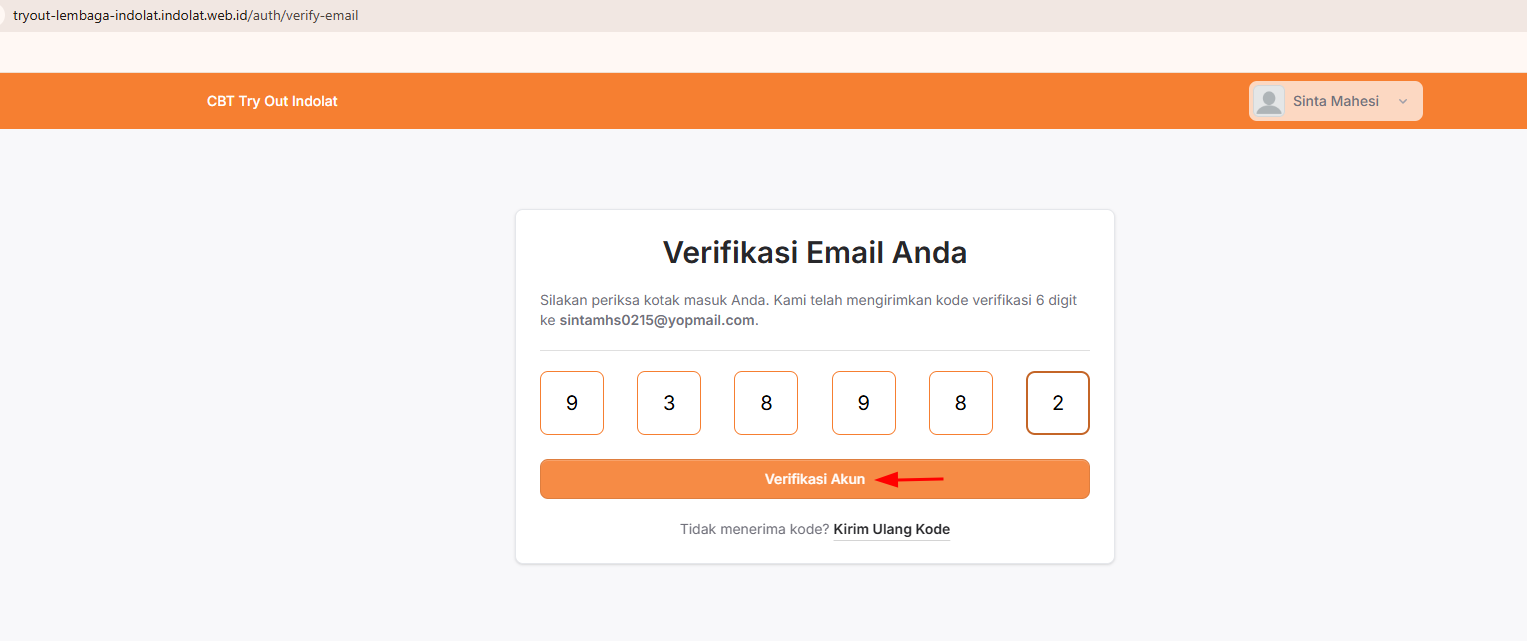
The verification code is only valid for 5 minutes. If the code hasn’t arrived or no longer works, choose Resend Code to get a new one.
5
The Participant Is Logged In to the CBT Page
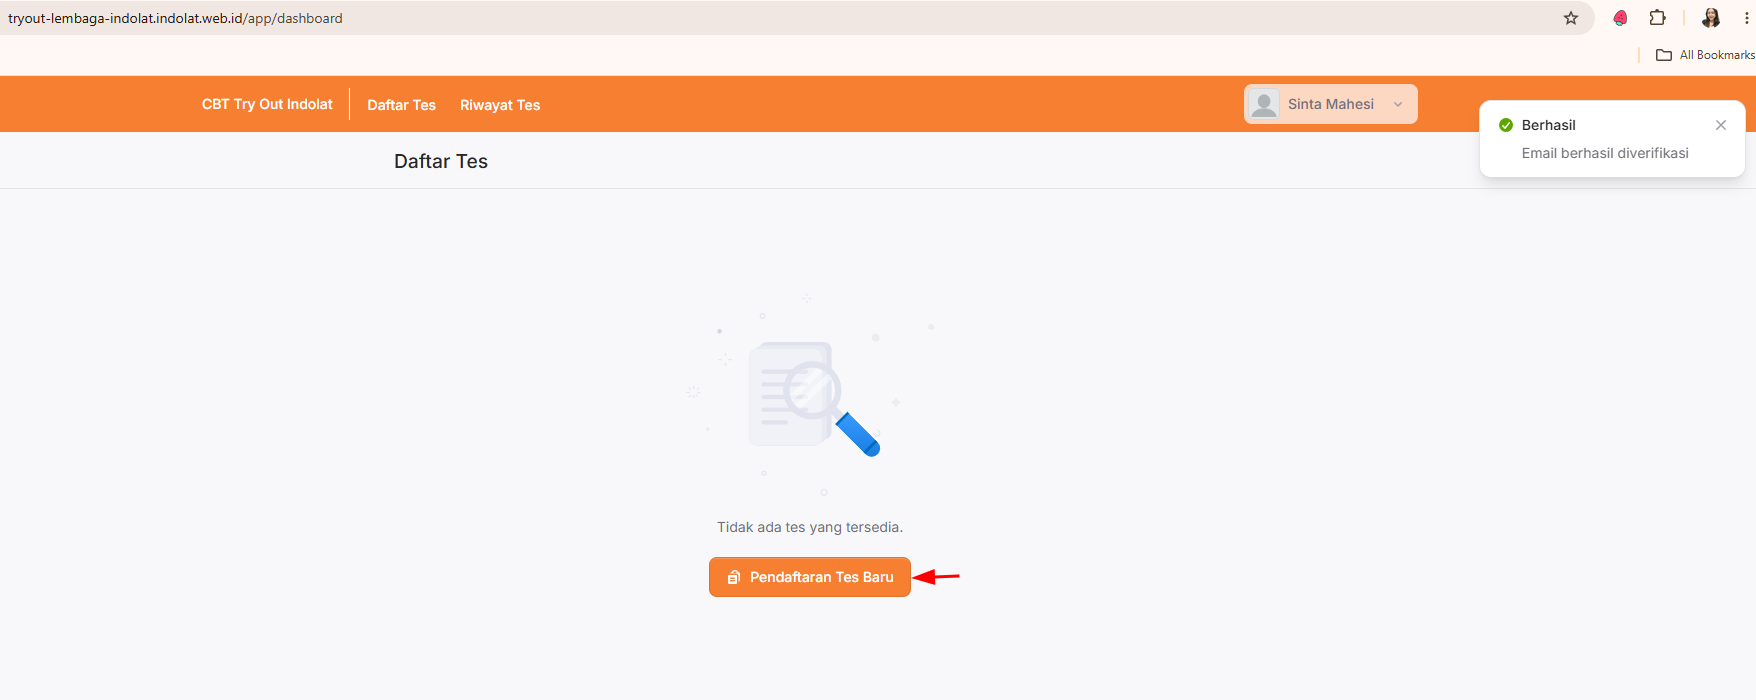
Email verification is only needed for participants who create their own account. Accounts that the admin adds through Import Accounts skip this step.