

SNBT 2027 Grand TryoutThe Mathematics test is ready. Next, you want to split participants into a Morning Session and an Afternoon Session so the exam runs more smoothly. In short:
- The test defines what participants work on.
- The exam session defines the schedule and the question package used.
- The Participant Exam Session defines which participants follow that schedule.
1. Create an Exam Session
1
Open the Test You Created
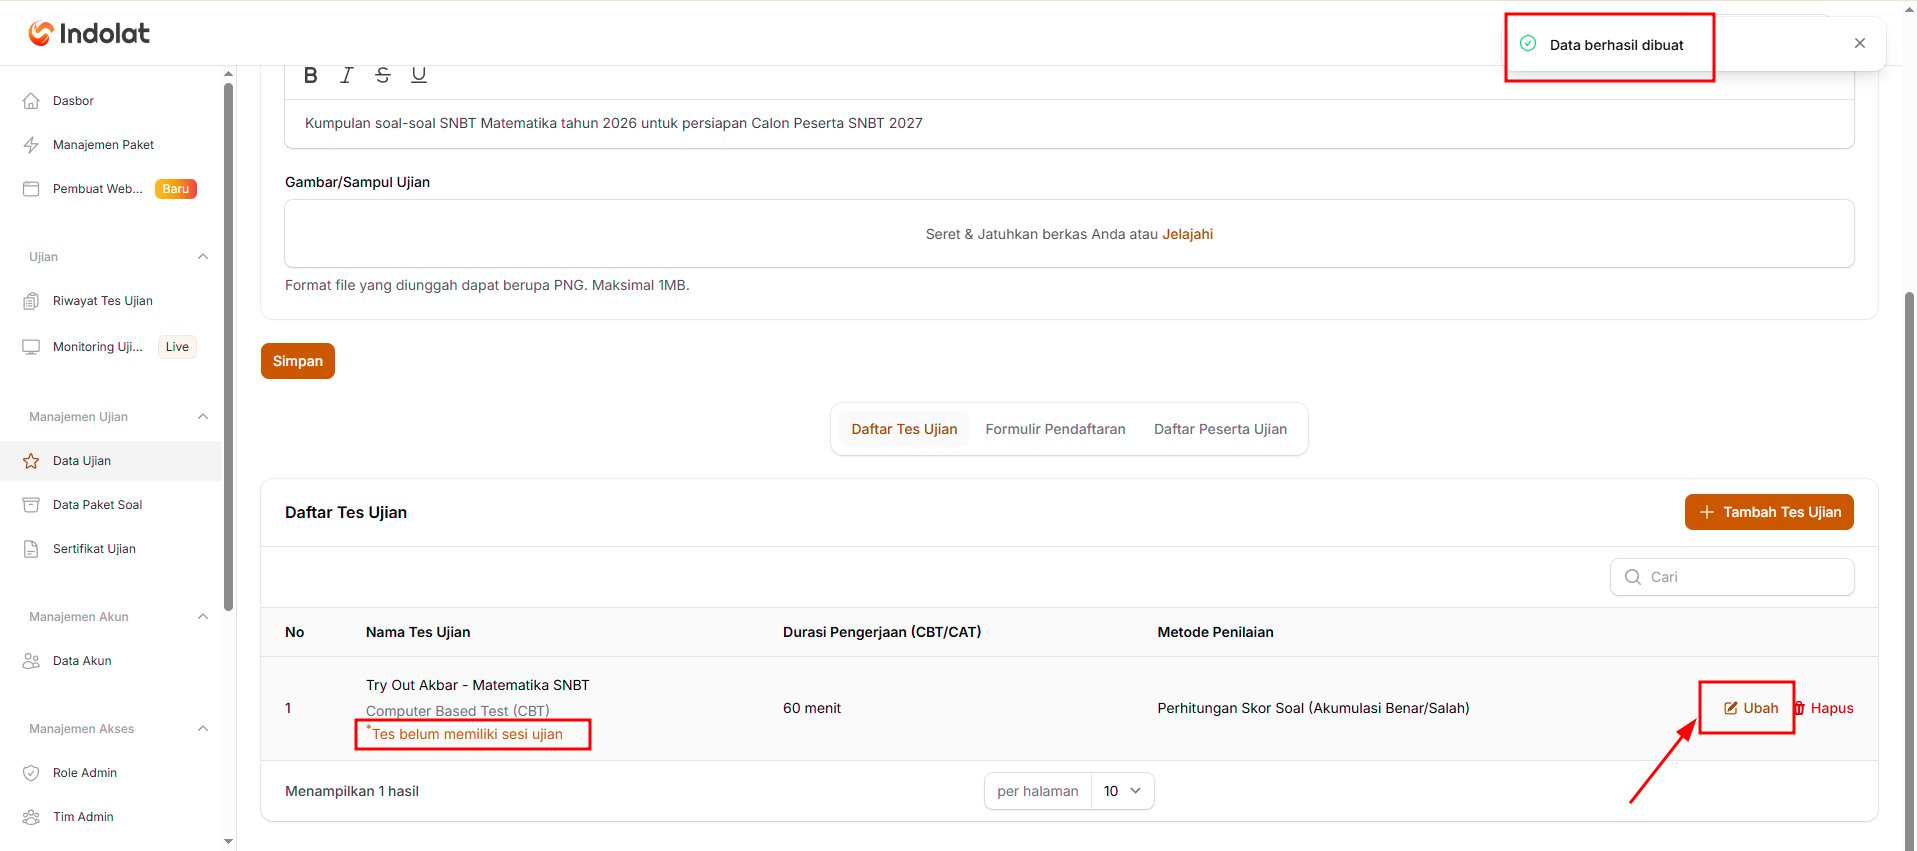
Look out for the label This test has no exam session yet.It means the test is saved but has no schedule yet, so participants can’t take it. Click Edit on the test you want to continue with.
2
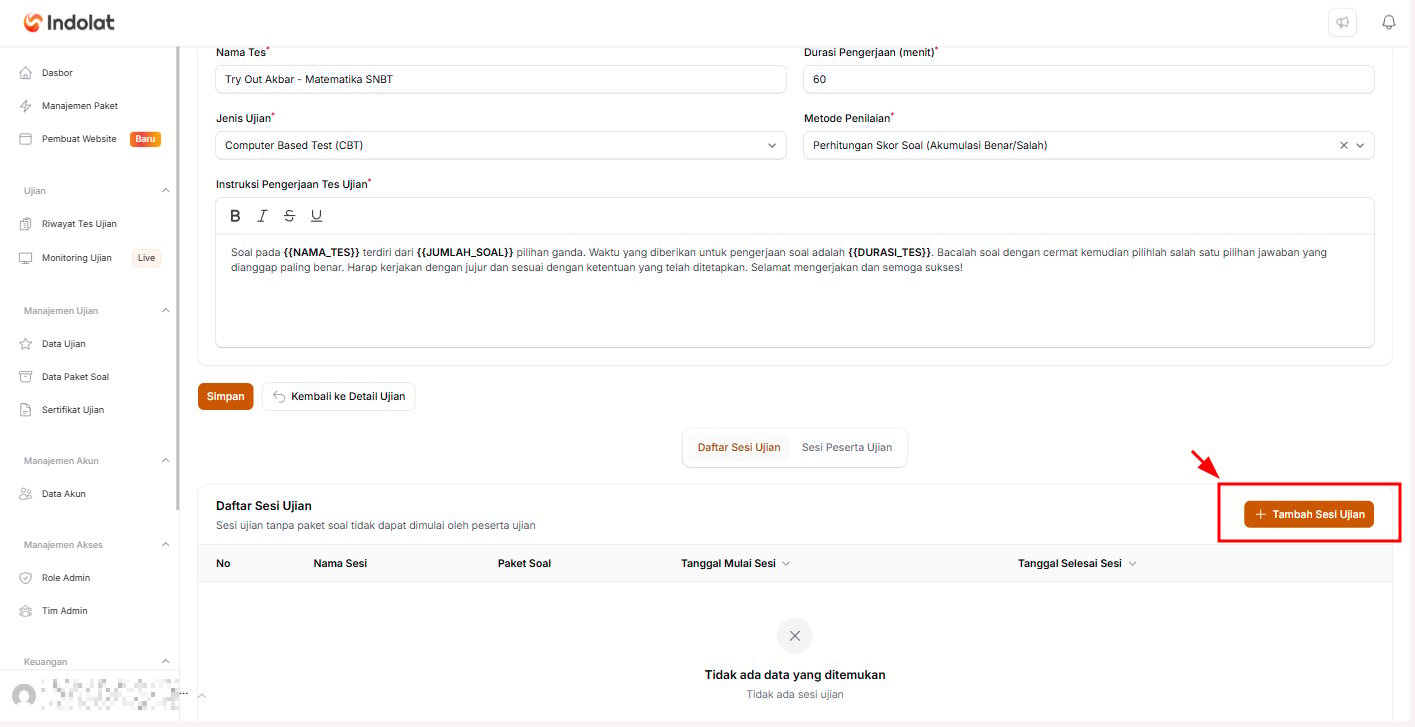
Click Add Exam Session
3
Fill In the Exam Session Details
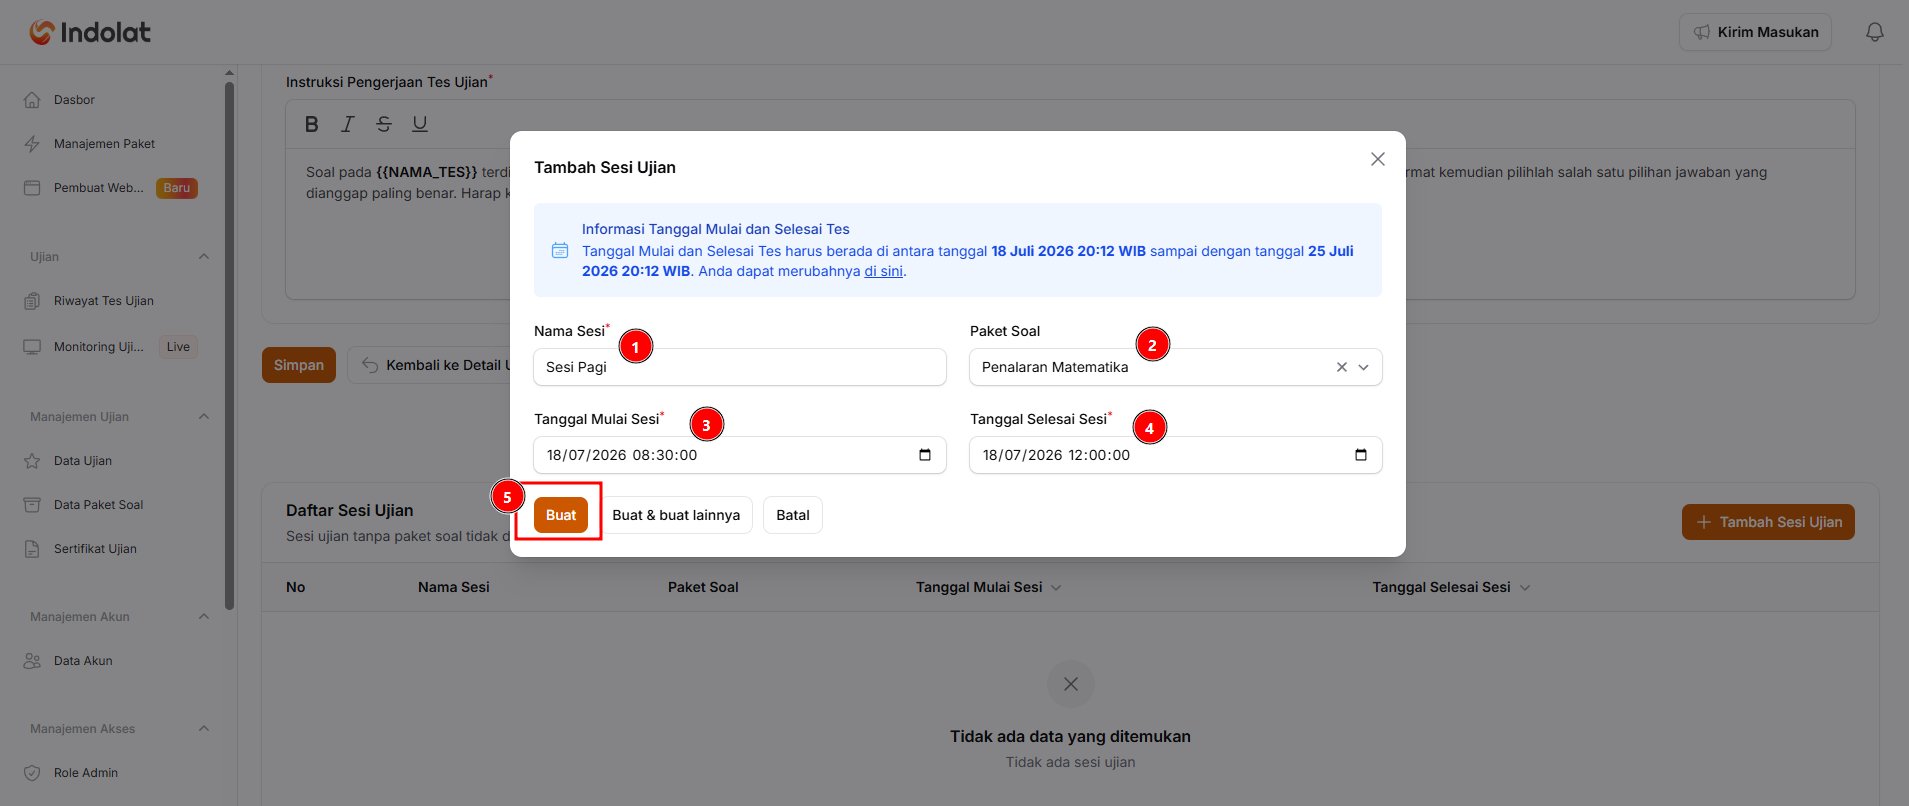
- Session Name: enter a name that’s easy to recognise.
Example: Morning Session or Session 1. - Question Package: choose a question package you’ve already created.
Make sure you choose one, because participants can’t start a session without a question package. - Session Start Date: set the date and time from which participants can start the test.
- Session End Date: set the deadline by which participants must finish the test.
- When everything is filled in, click Create. Choose Create & create another if you want to add the next session straight away.
Keep in mind that session dates must fall within the date range of the main exam you’ve already set.Example:
The exam runs from 18 to 25 July 2026. So a session can’t be scheduled before 18 July or after 25 July 2026.Also, the session’s time window (from Session Start Date to Session End Date) can’t be shorter than the test’s Working Time (minutes).
2. Link Participants to an Exam Session
1
Open Participant Exam Session

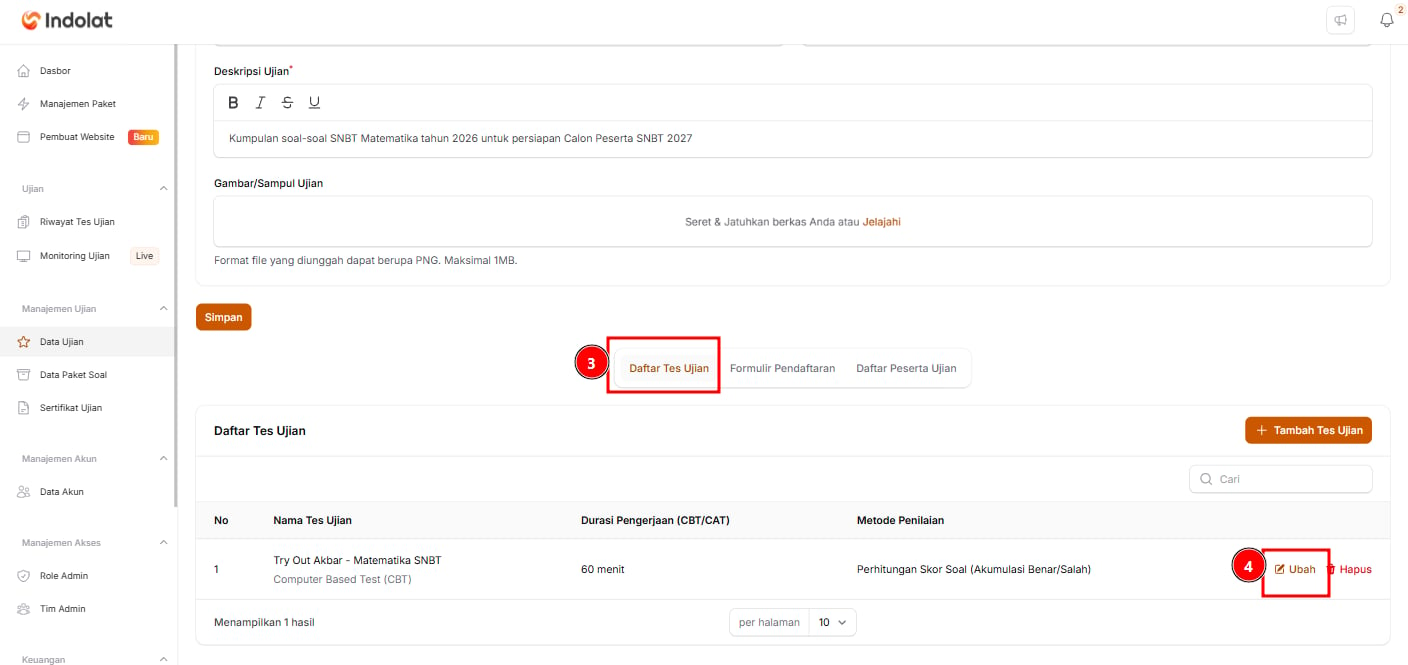

- Open the Exam Data menu.
- Choose the exam the participants will take.
- Click Details.
- The system opens the details page. Go to the Test List section.
- Click Edit on the test.
- The system opens the test details page.
- Choose Participant Exam Session.
2
Add Participants to the Exam Session
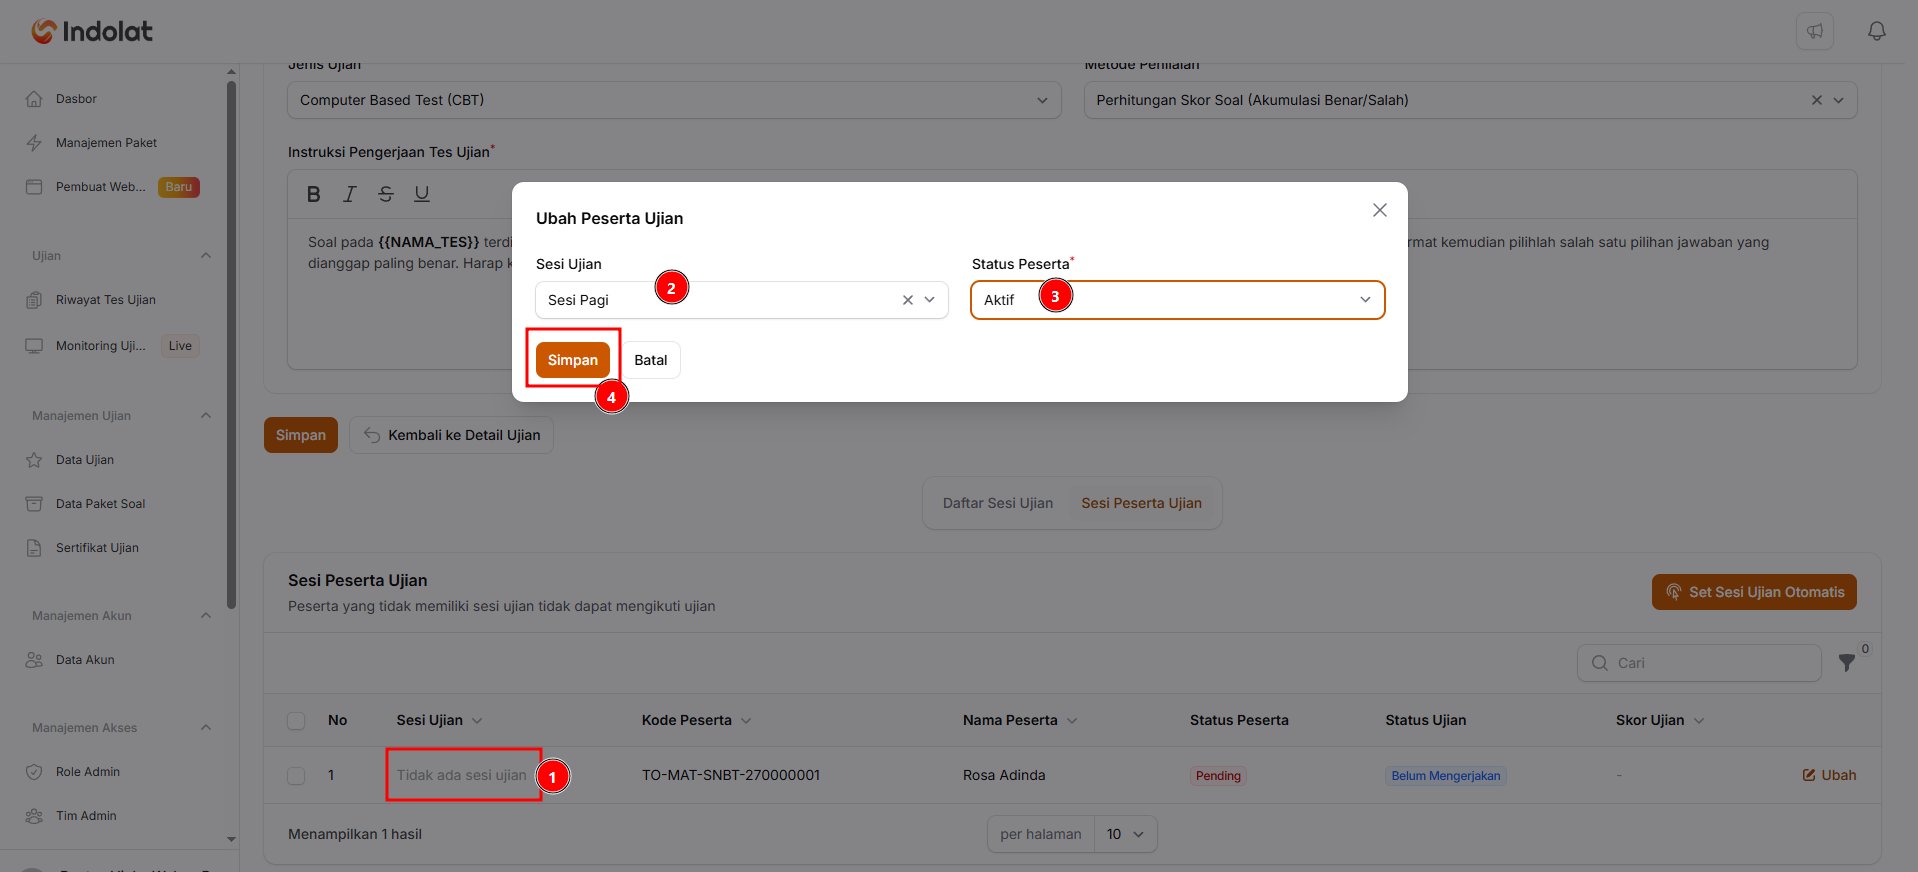
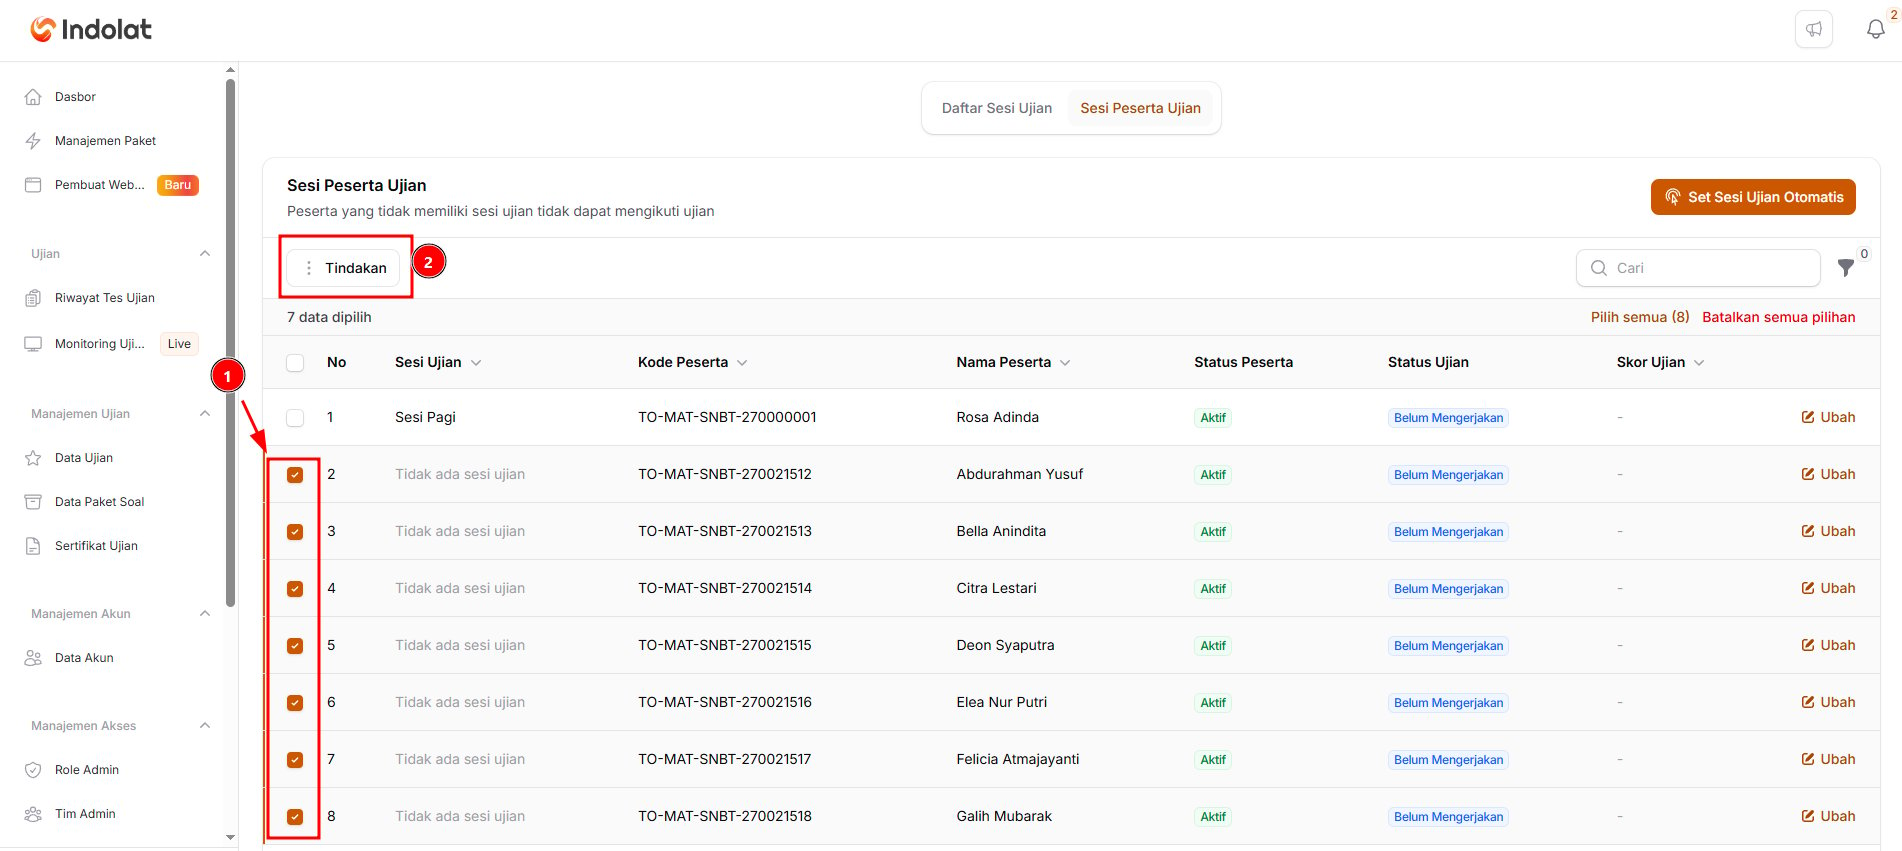
- Tick the participants still marked No exam sessions.
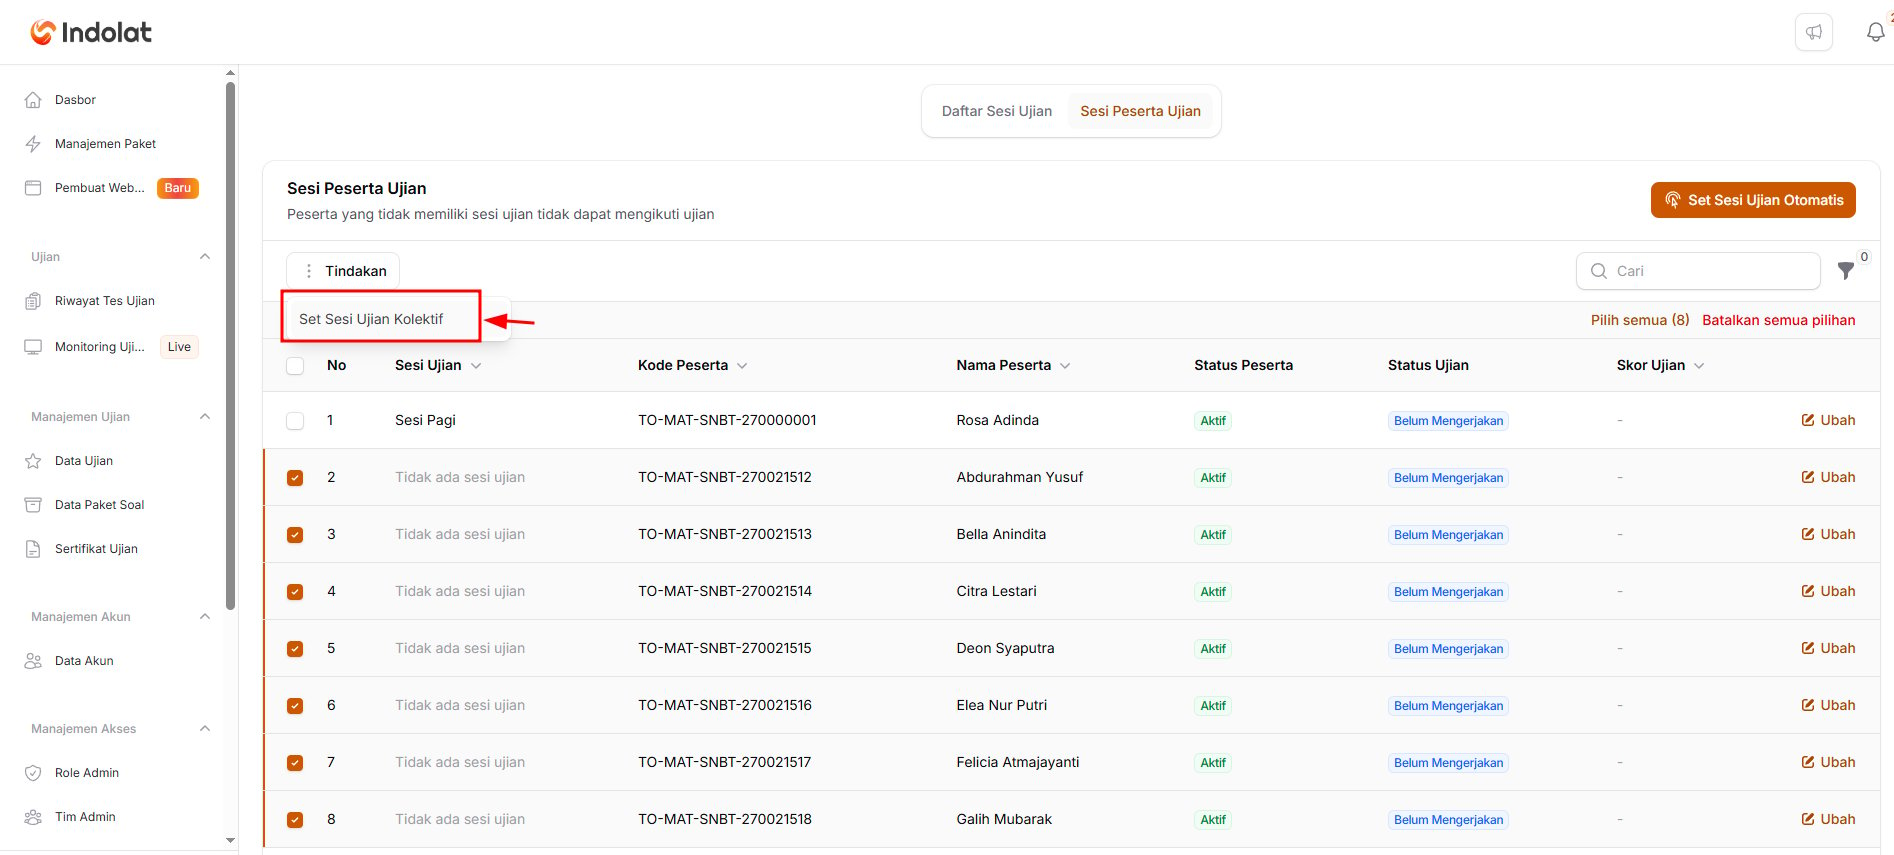
To select every participant, click Select all. - Click Bulk actions, then choose Assign Exam Sessions in Bulk.
- Choose the session the participants will take, for example Morning Session.
- Click Assign Exam Sessions in Bulk to save the change.
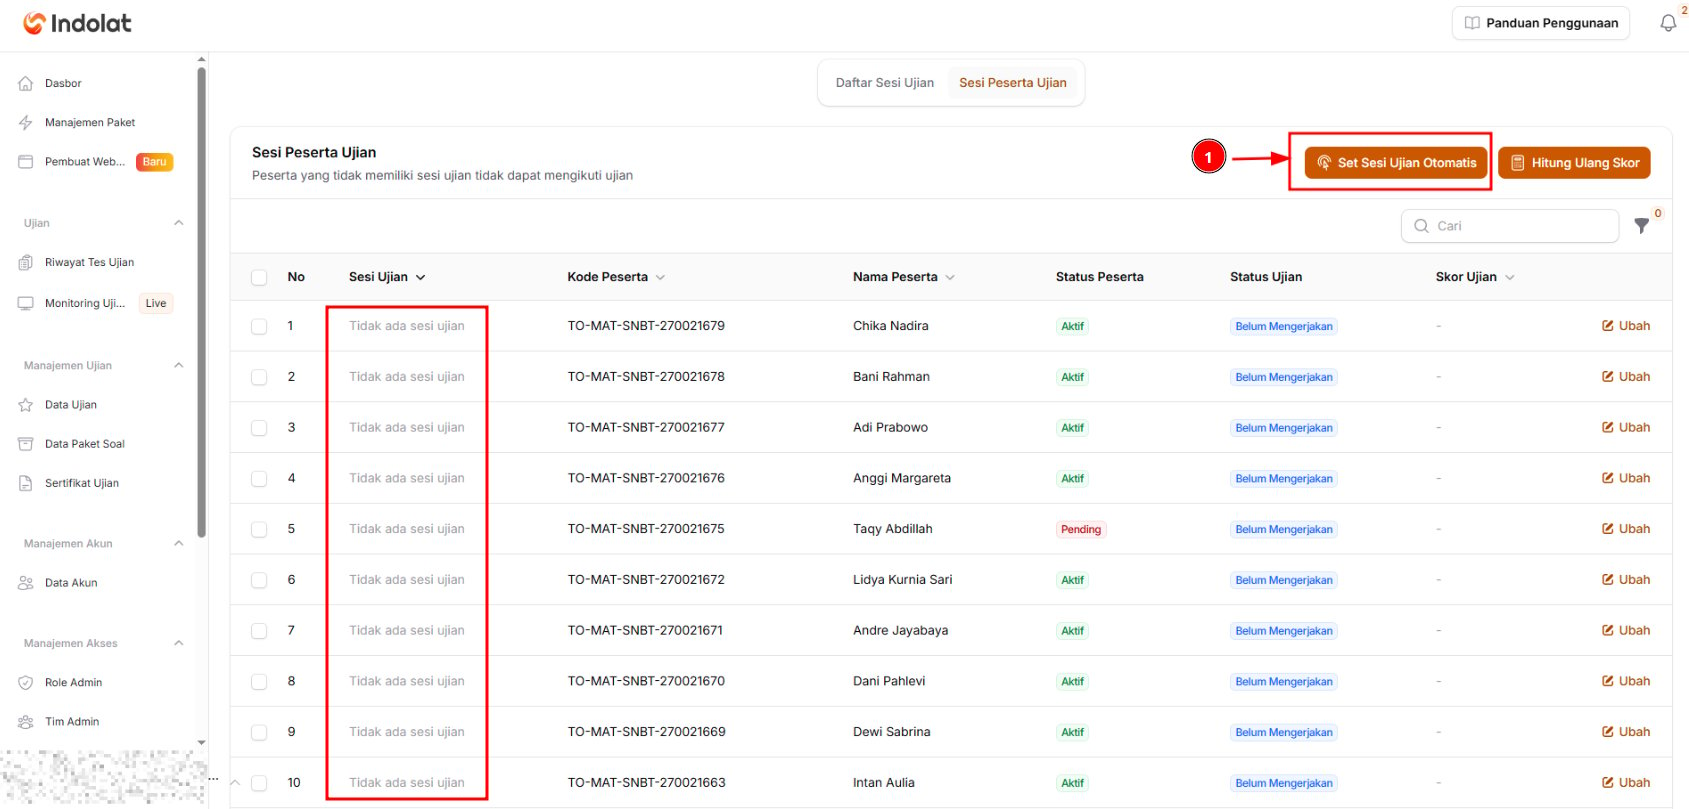
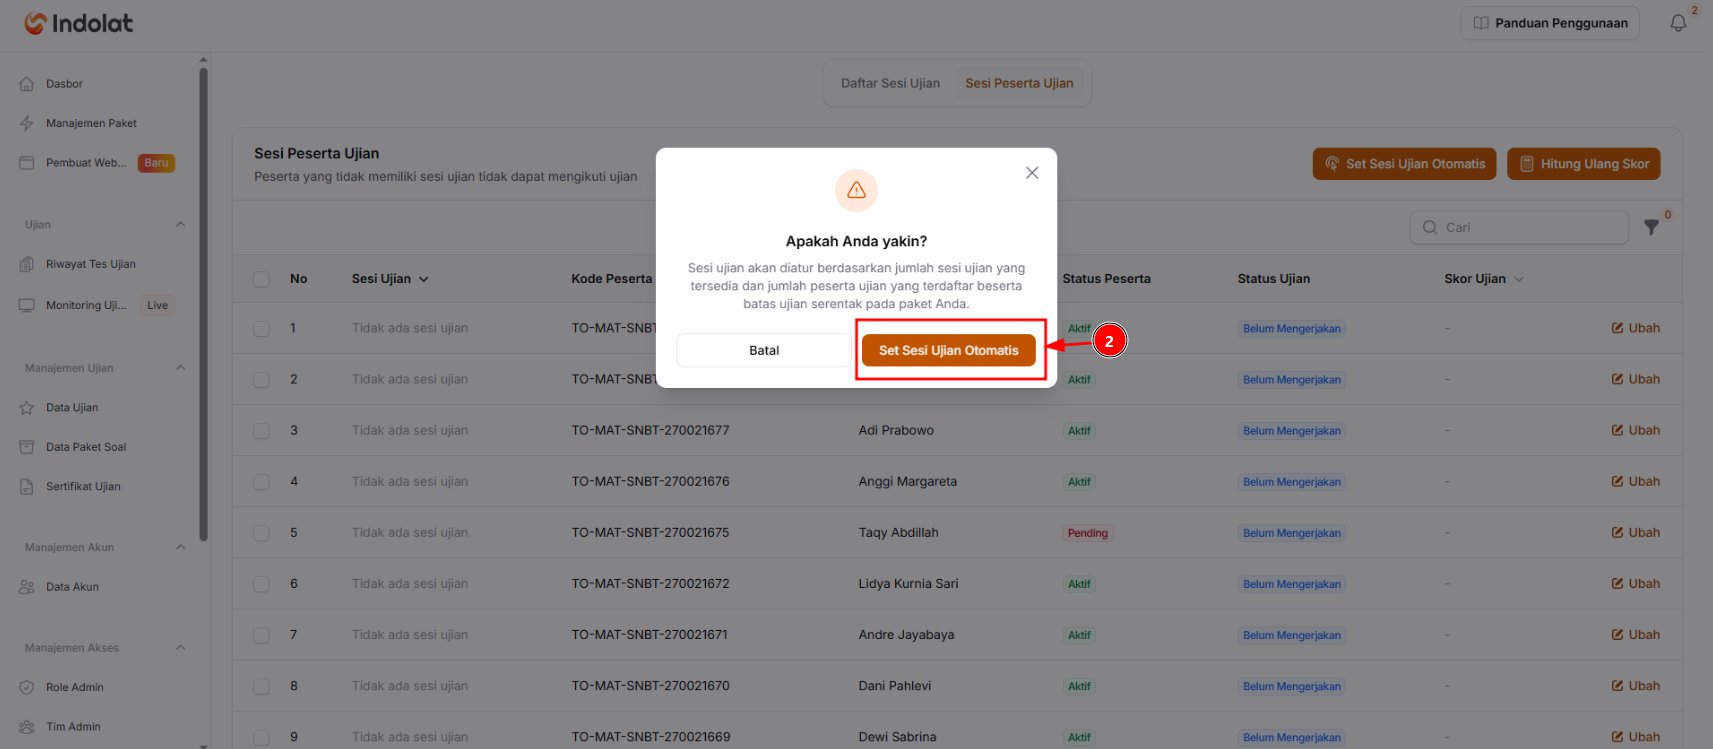
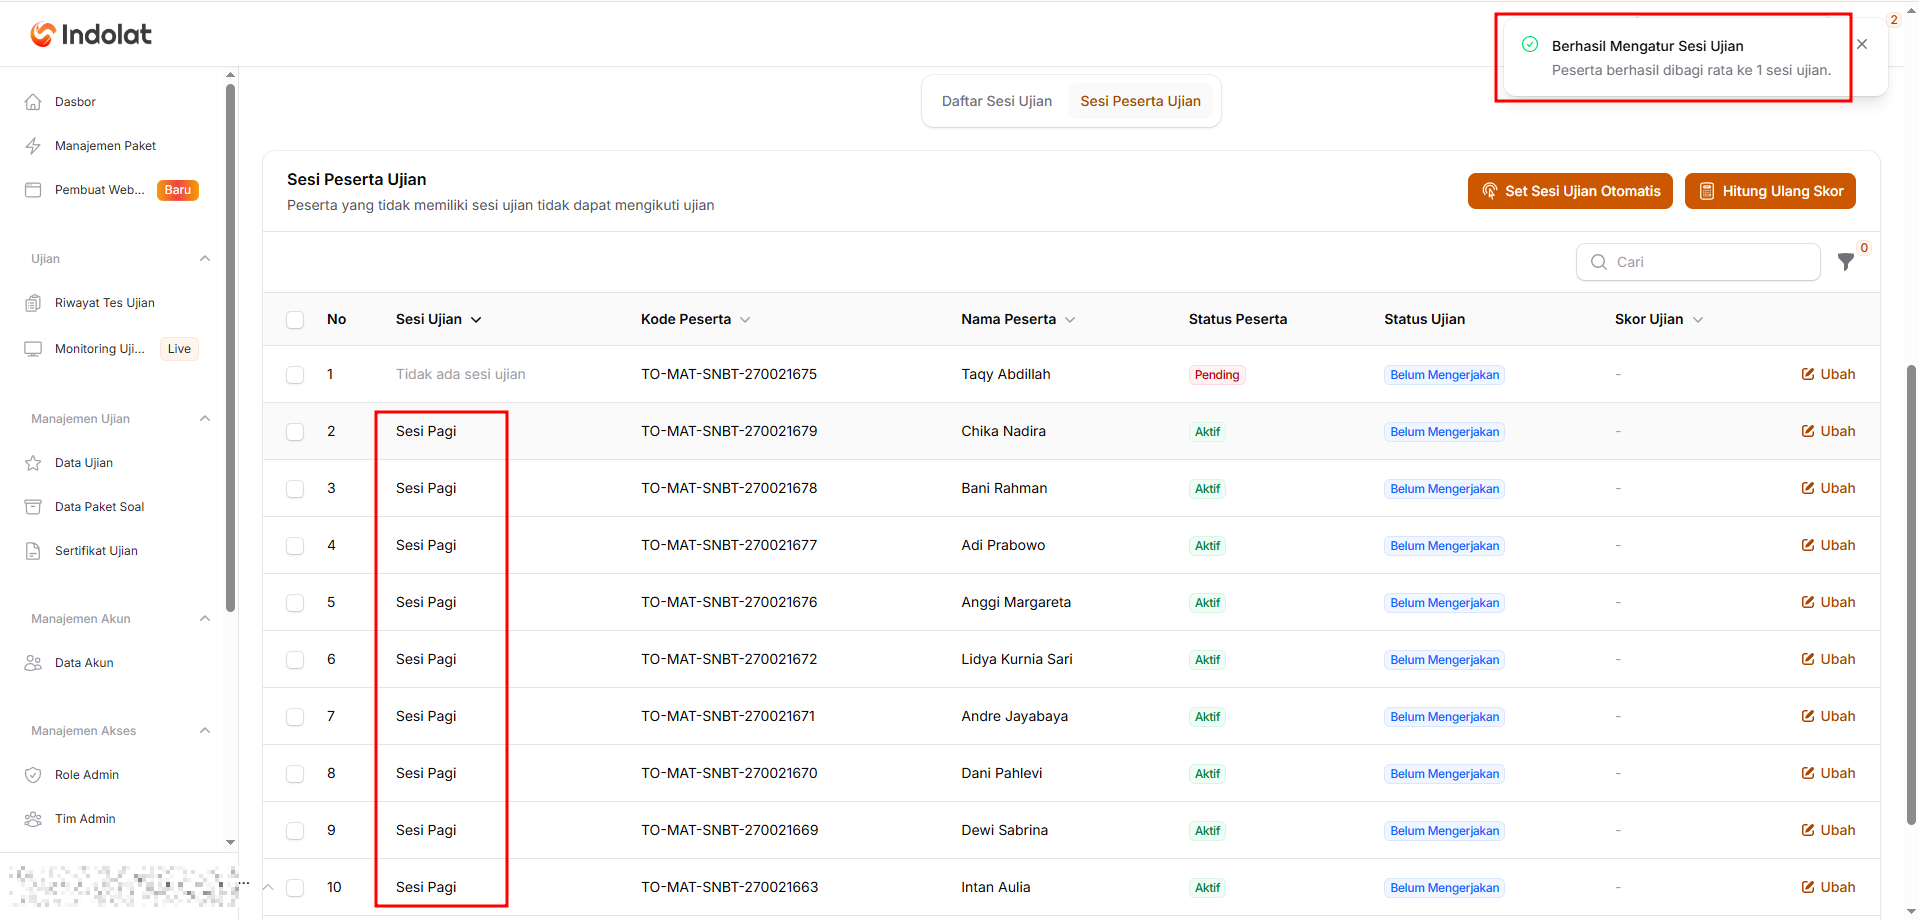
- Click Assign Exam Sessions Automatically.
- The system shows a confirmation dialog. Click Assign Exam Sessions Automatically.
- Wait for the message saying the sessions were assigned. When it’s done, the session name appears for every participant with the Active status.
The system spreads every participant whose status is still Active (not started yet) evenly across this test’s exam sessions, in order of session start time. Participants with the Active status who already have a session are included too, so any session you assigned to them earlier is replaced. Participants who are taking the test or have finished it are never moved, and participants with any other status (such as Pending) aren’t put in a session. To put specific participants in a specific session, use the bulk method.The Assign Exam Sessions Automatically button only appears when the test has at least one exam session, at least one participant still has no session, and no participant is currently taking the test.
3
Check Participants' Sessions
Make sure no participant is still marked No exam sessions. Once participants have been put in a session, they can start the test according to the session schedule.
3. (Optional) Change or Move Participants to Another Session
Participants who already have a session can be moved to another one if the schedule changes or you need to split participants differently. 💡 For example, some participants were first registered in the Morning Session but need to move to the Evening Session because they can’t make the original time.1
Open Participant Exam Session
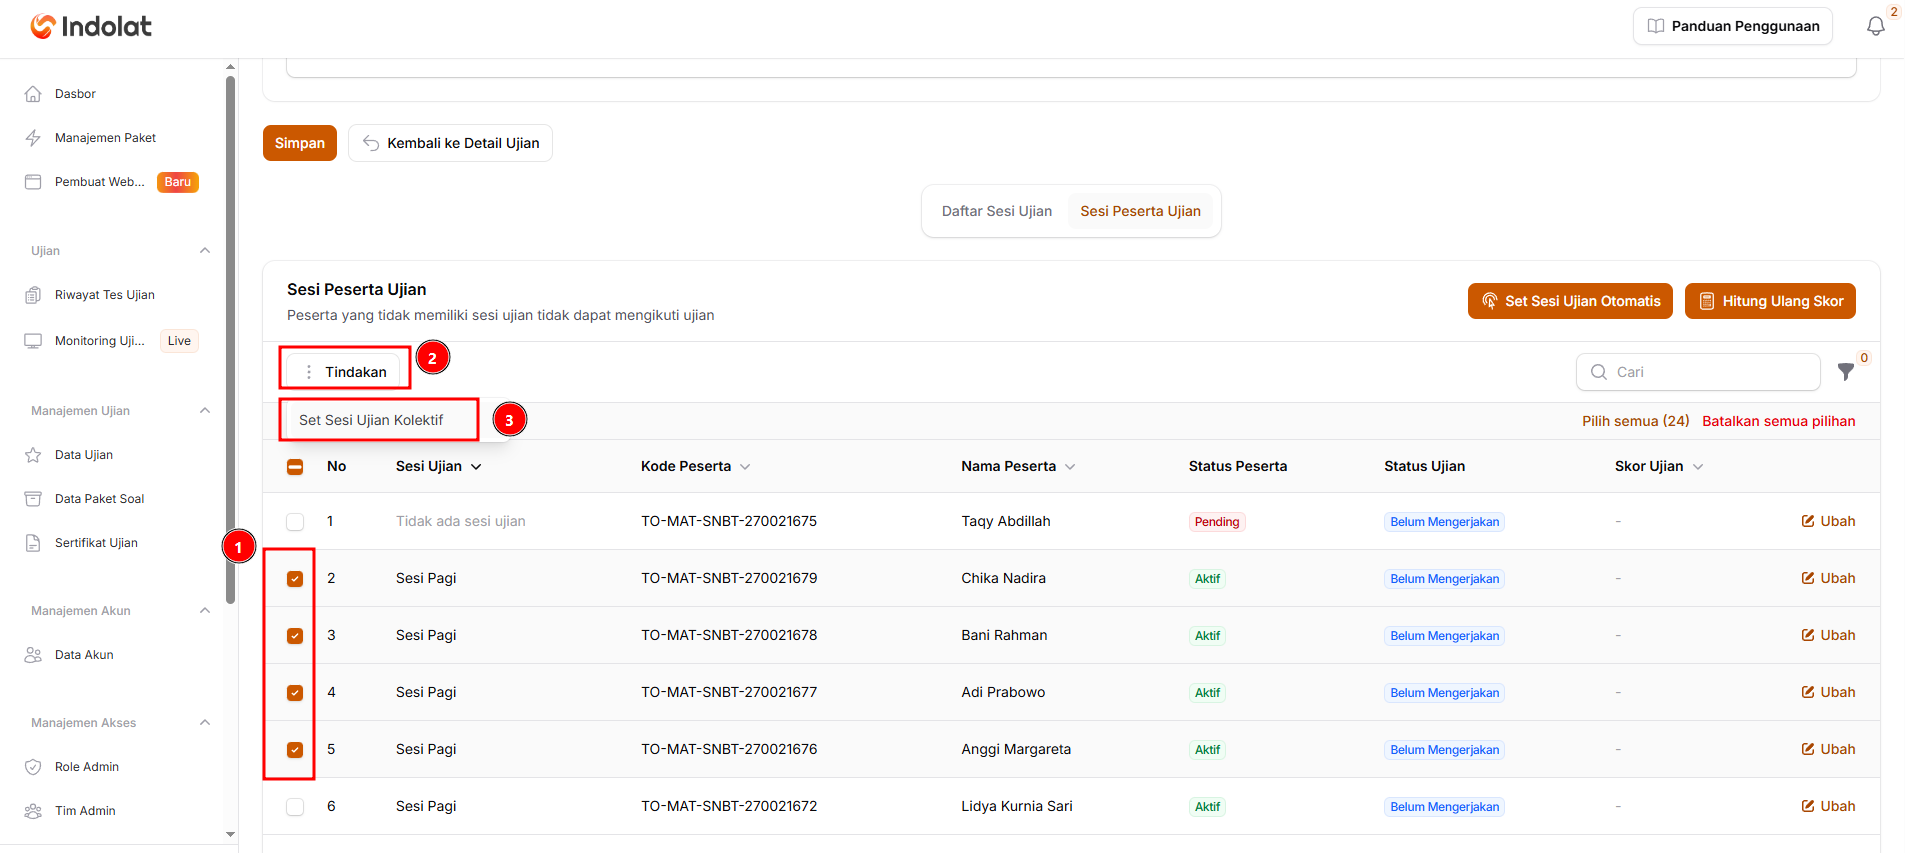
- Tick the participants you want to move to another session. You can select one participant or several at once.
- Click Bulk actions.
- Choose Assign Exam Sessions in Bulk.
2
Select an Exam Session
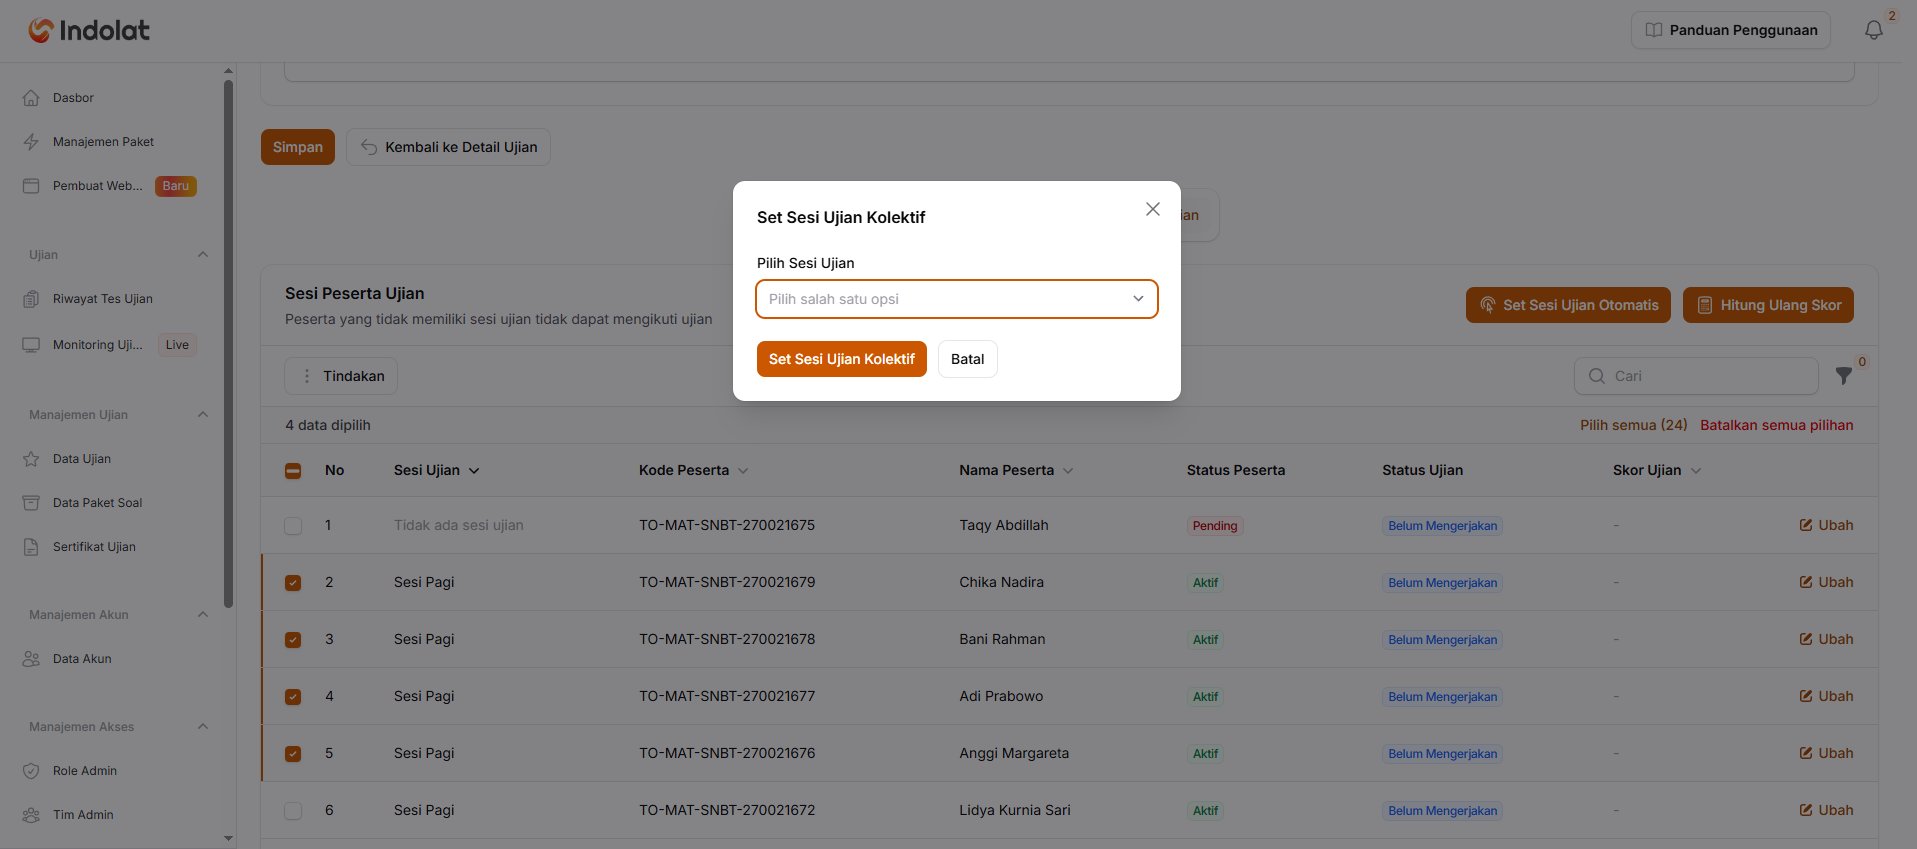
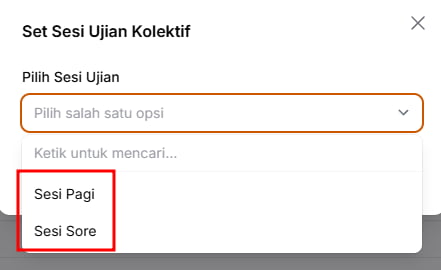
You want to move participants from the Morning Session to the Evening Session.
3
Click Assign Exam Sessions in Bulk
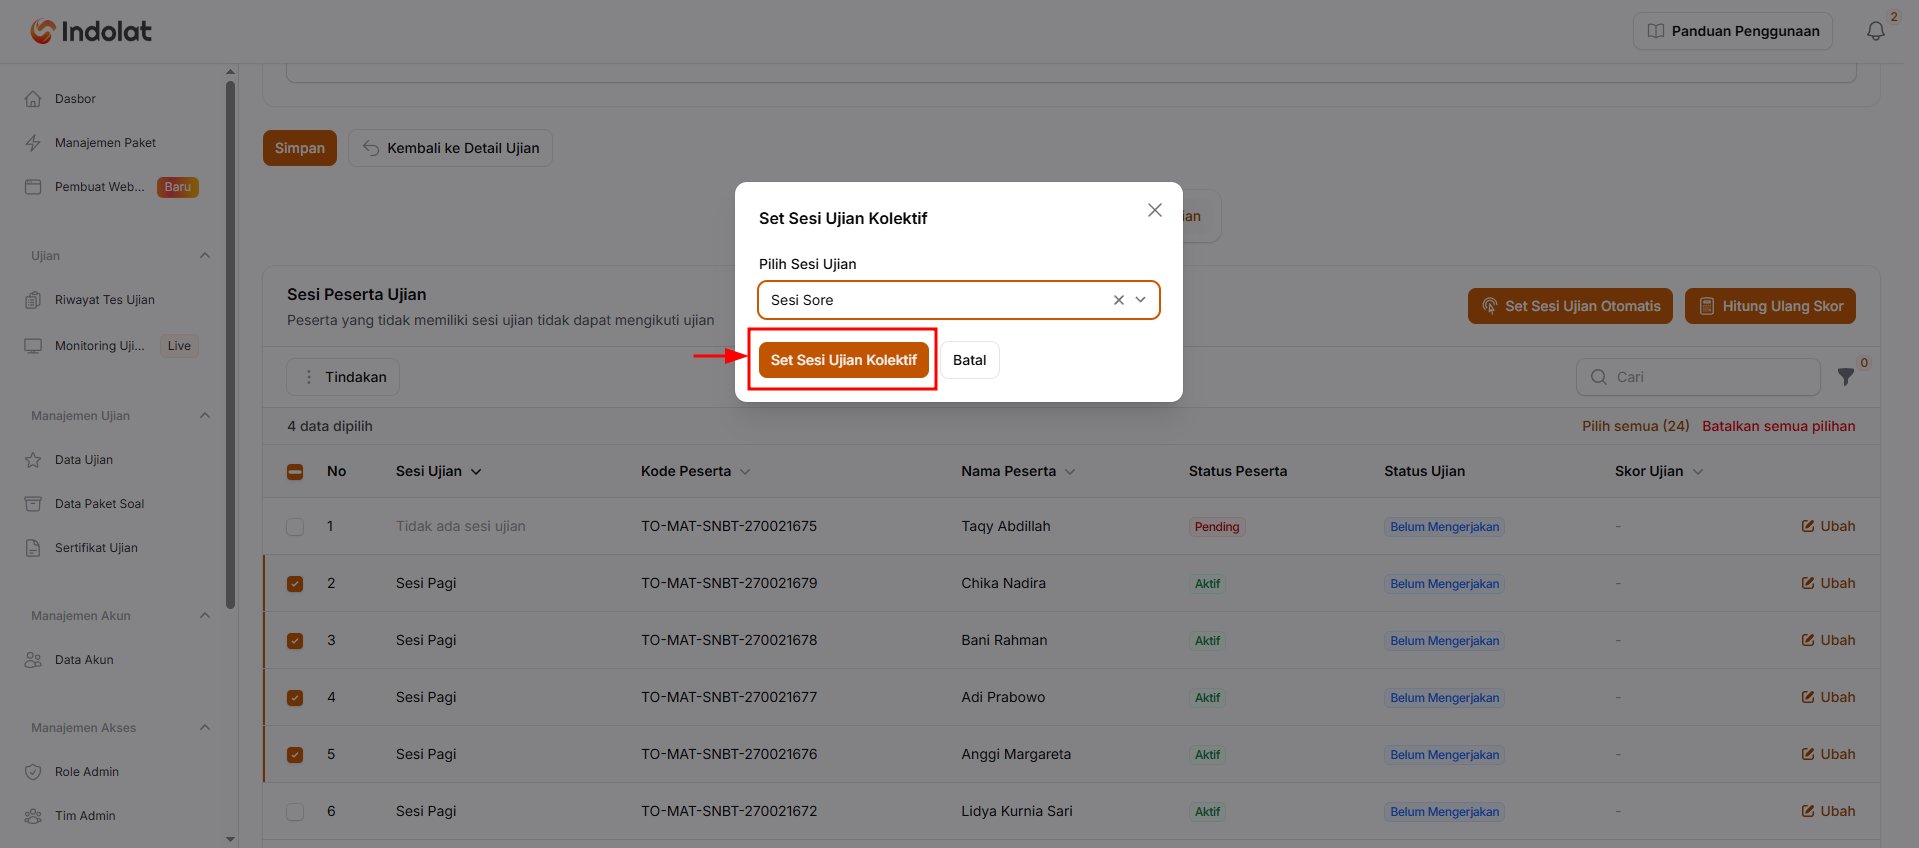
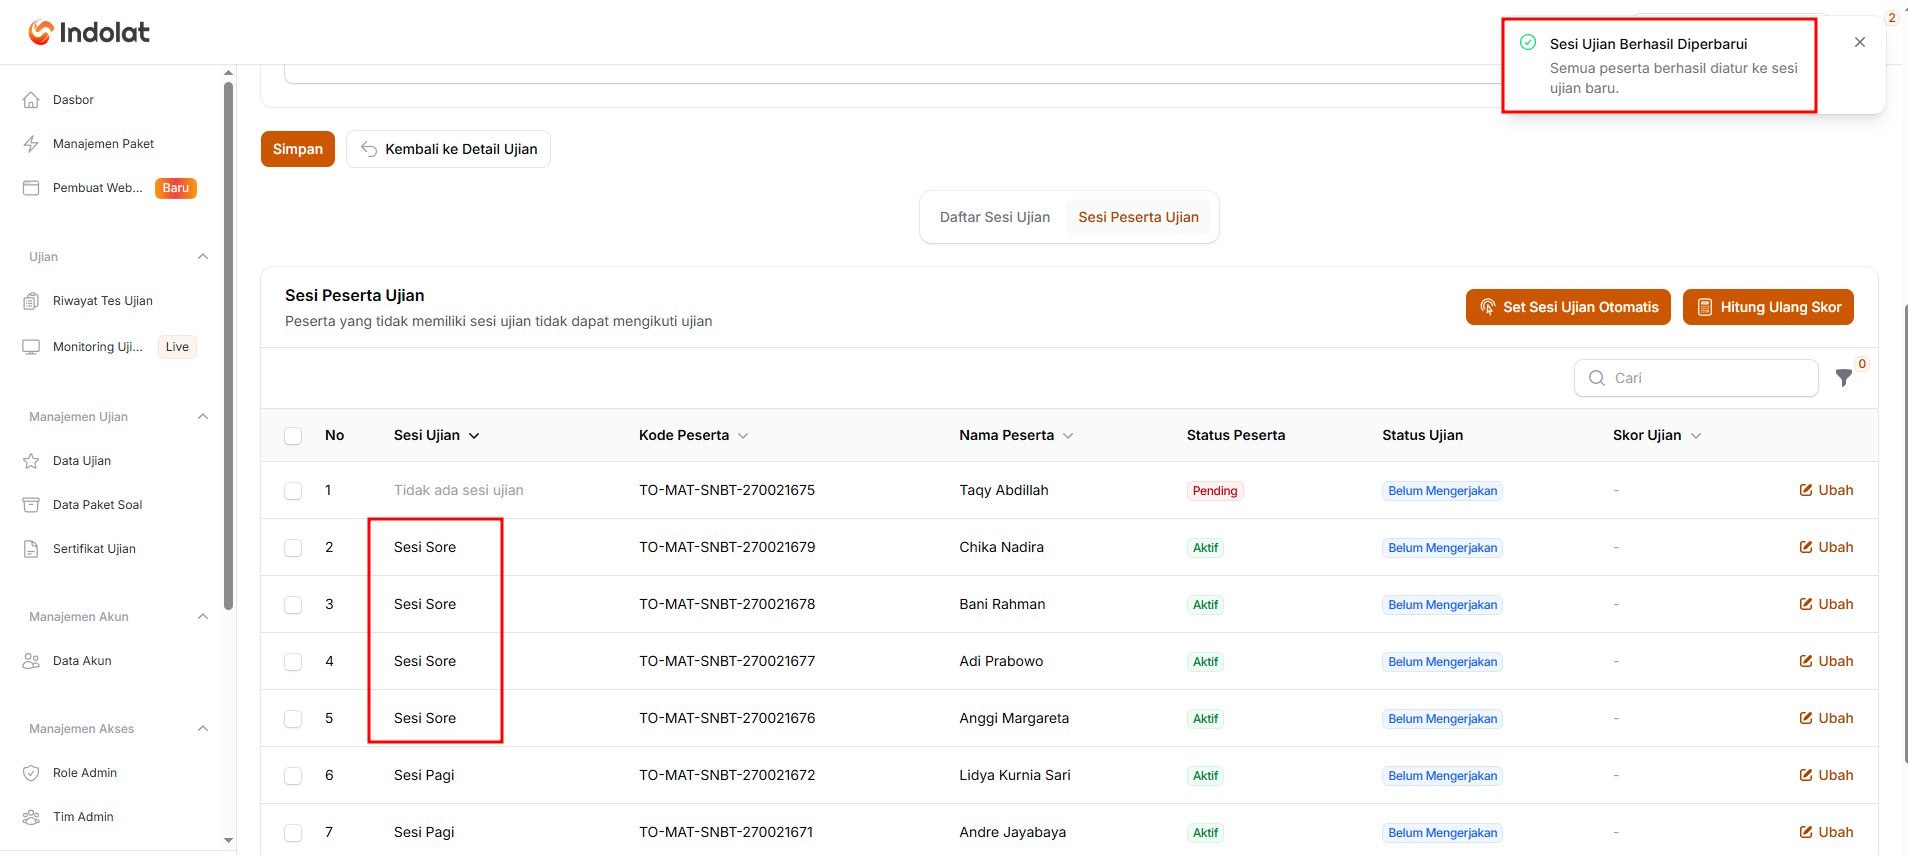
Before moving participants, make sure the target session is still available and hasn’t ended yet. Participants who have already started the test can’t be moved to another session unless their exam is reset first with the Reset Exam button (the answers they’ve saved are deleted).