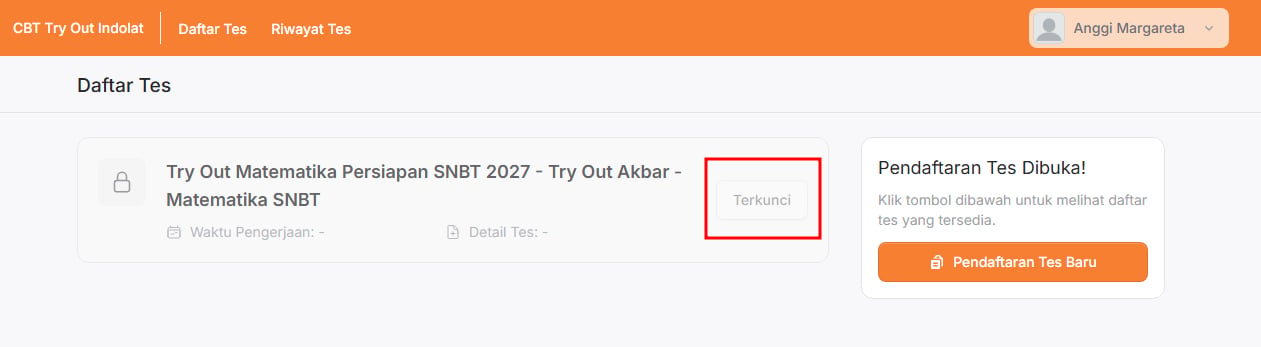

SNBT 2027 Grand TryoutYou already have the participant data and want to add those participants to the exam so they can take the tryout. You can choose either of these two methods:
- Import accounts through the Account Data menu (the Import Accounts button), then add the participants to the exam manually.
- Import participants through the Exam Data menu (the Import Participants button), so the participant accounts go straight into the chosen exam.
Add Participants by Importing Account Data
Add Participants by Importing Account Data
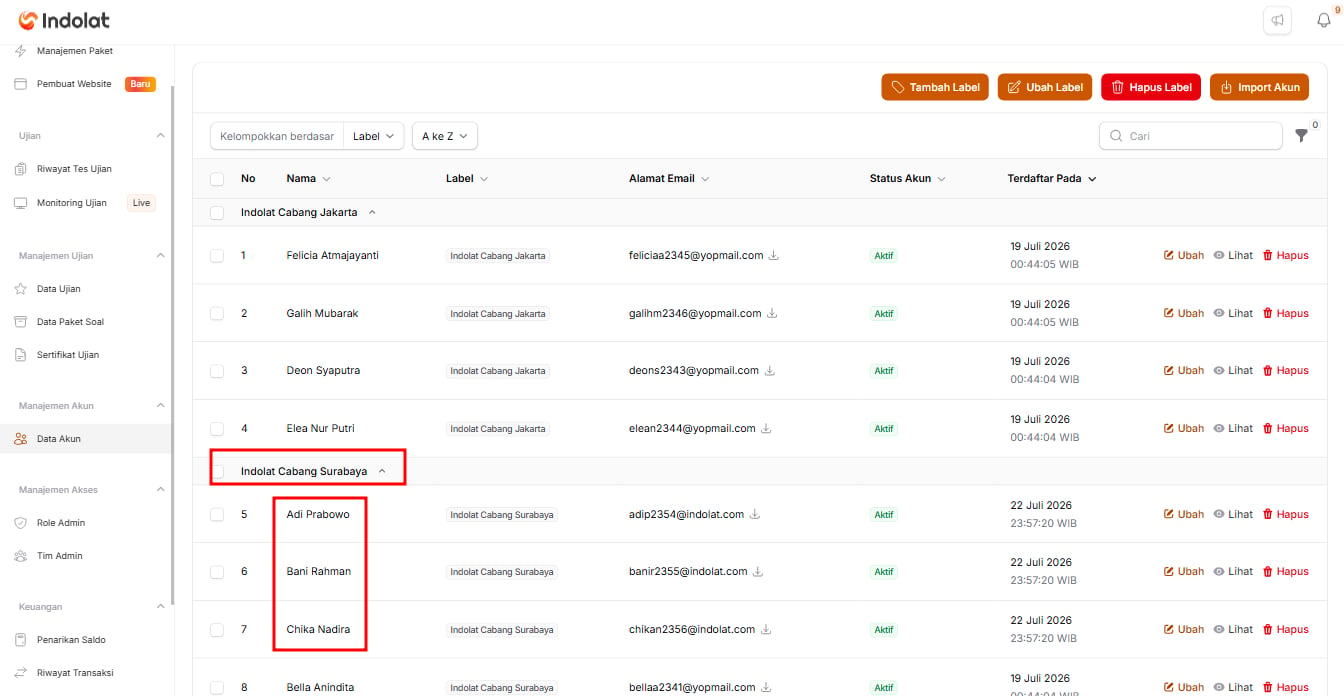
Use this method if you want to prepare the participant data first.💡 For example, you have a list of participants from the Surabaya Branch. They will later take several different exams, so their data goes into the Account Data menu first.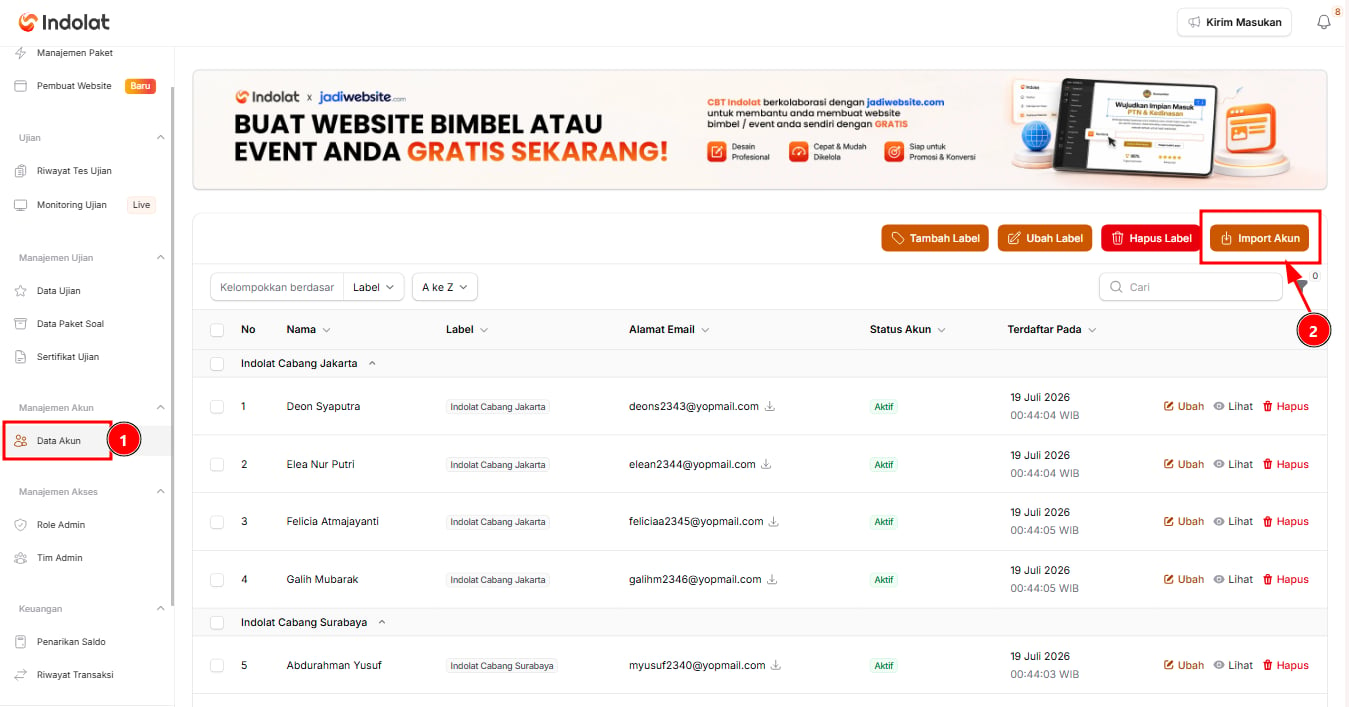
1
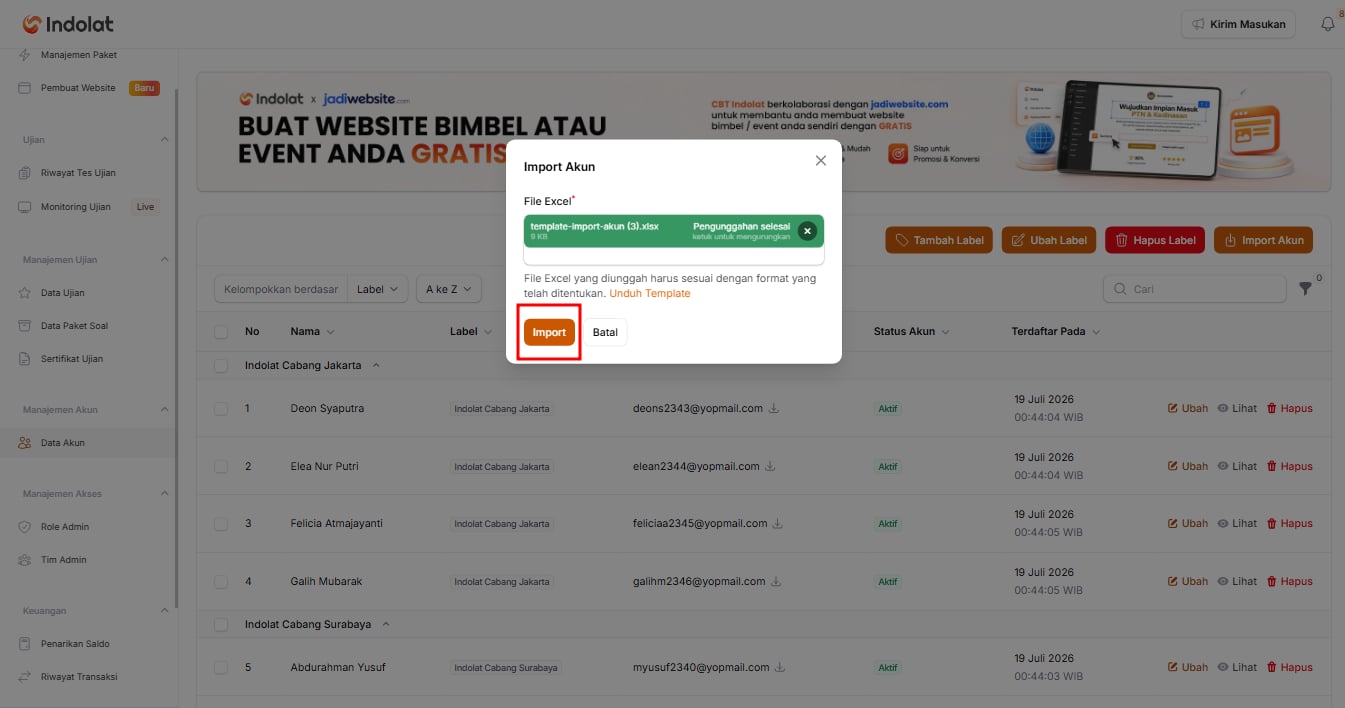
Open Account Data and Click Import Accounts
2
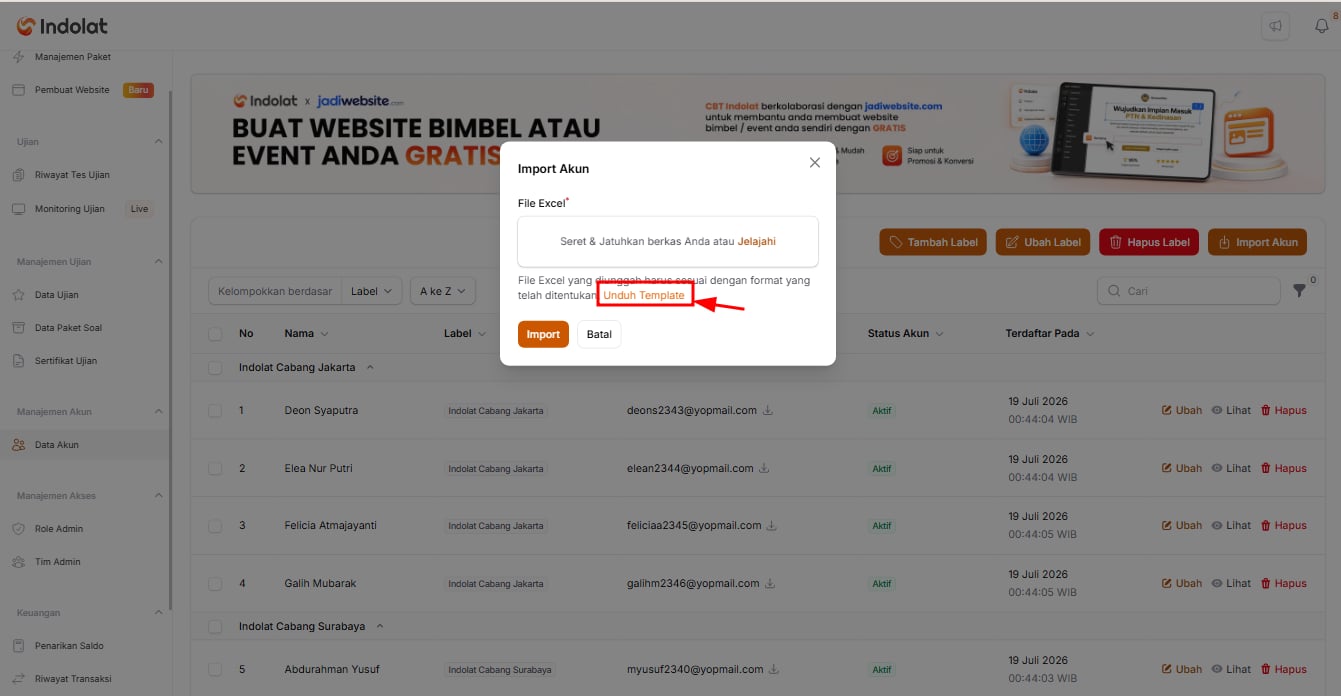
Download the Excel Template
3
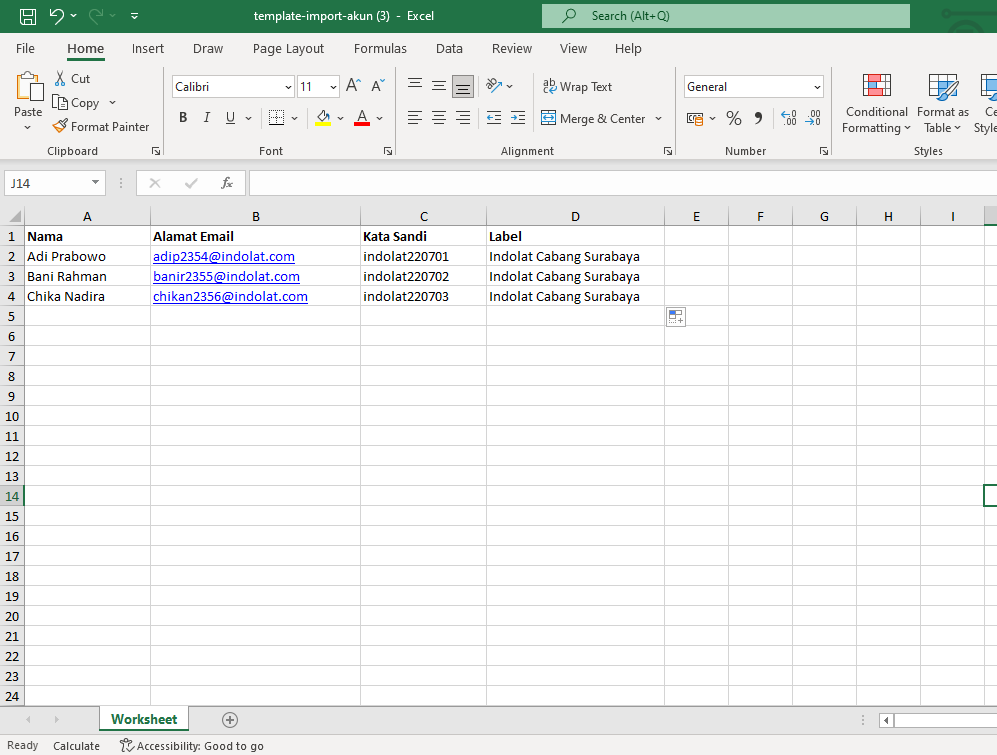
Fill In the Participant Data in the Excel File
- Name: enter the name of the participant who will take the exam.
- Email Address: enter the email the participant will use to log in.
- Password: enter a password for each participant.
- Label: a tag for grouping participants. This column can be left empty if you don’t need groups.
About email addressesDuring the import, the system doesn’t check whether an email address is actually active and valid. So admins can use email addresses created just for the exam, for example:
peserta001@indolat.compeserta002@indolat.com
4
Upload the File and Click Import
At this point, the participants are only saved as accounts and haven’t been added to any exam yet. To add them to an exam, open Exam Data, go to Exam Participant List, then use the Add Participant button.
5
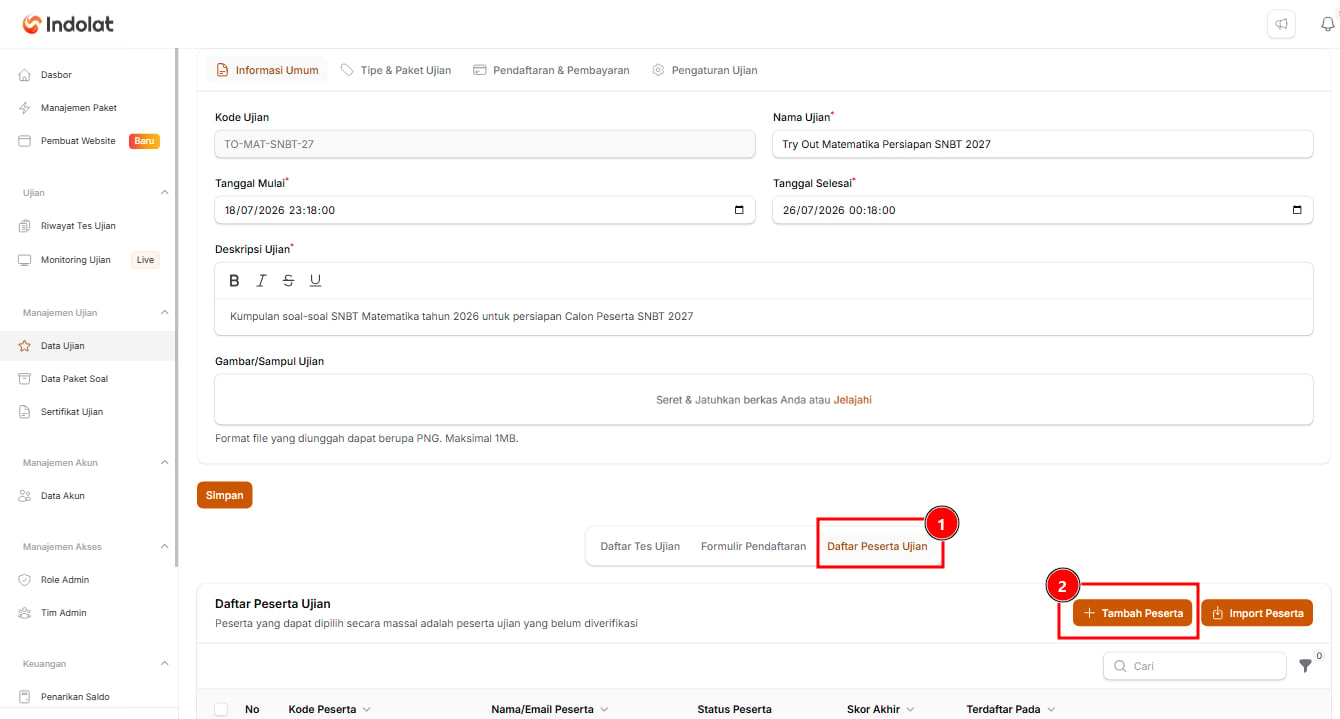
Open the Exam Details
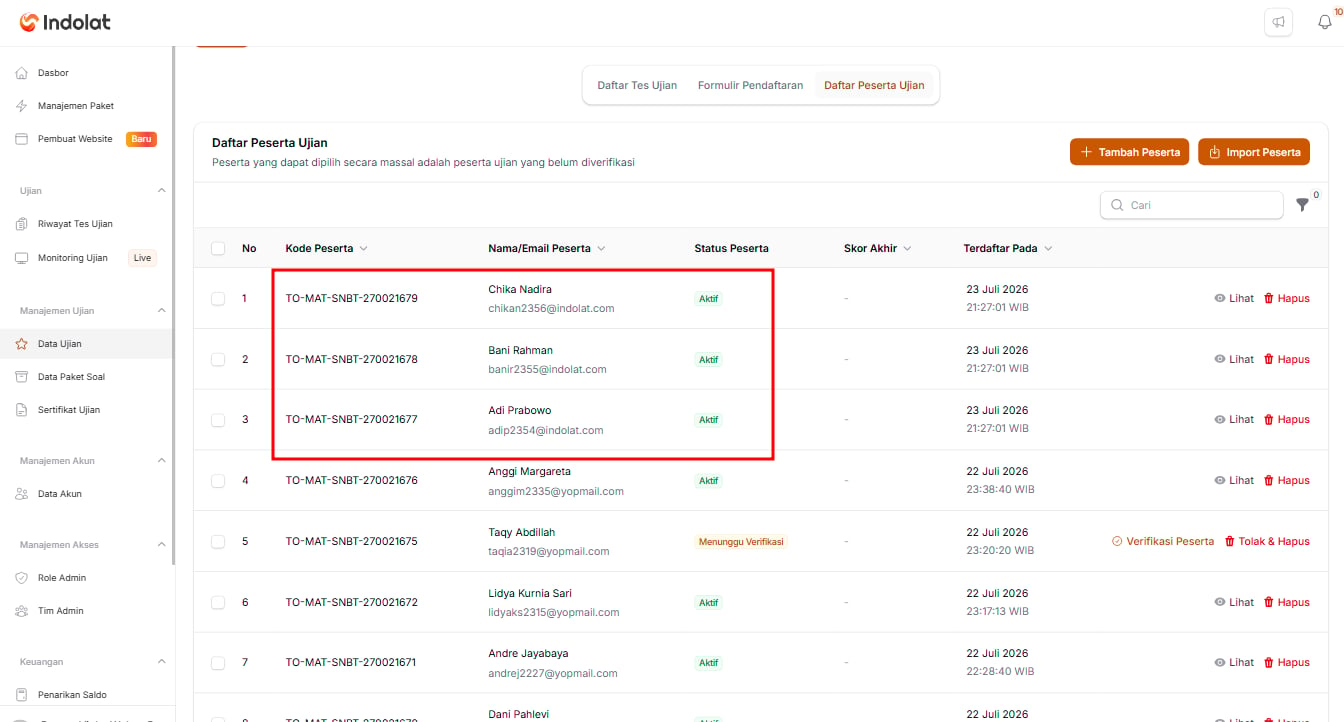
Once the participant accounts are in the Account Data menu, the next step is to add the participants to the exam they will take.💡 For example, you’ve imported participants from Indolat Surabaya Branch. Next, they need to be added to the SNBT 2027 Grand Tryout so they can take the exam.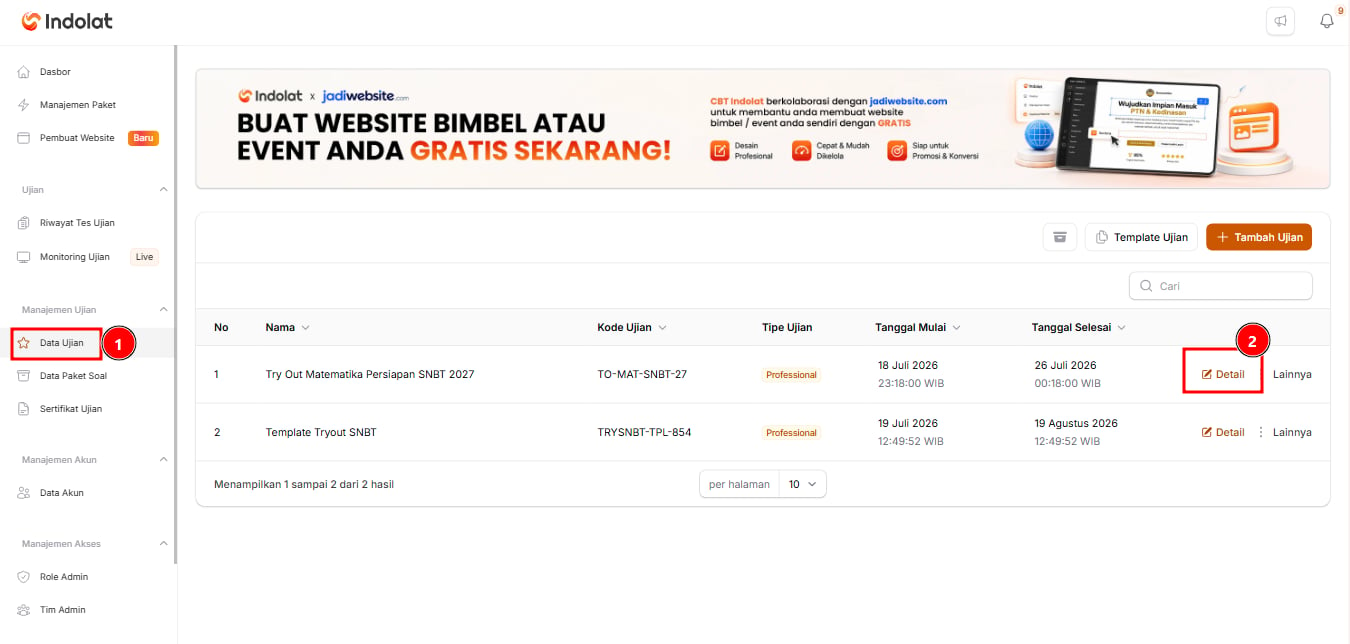
6
Click Add Participant
7
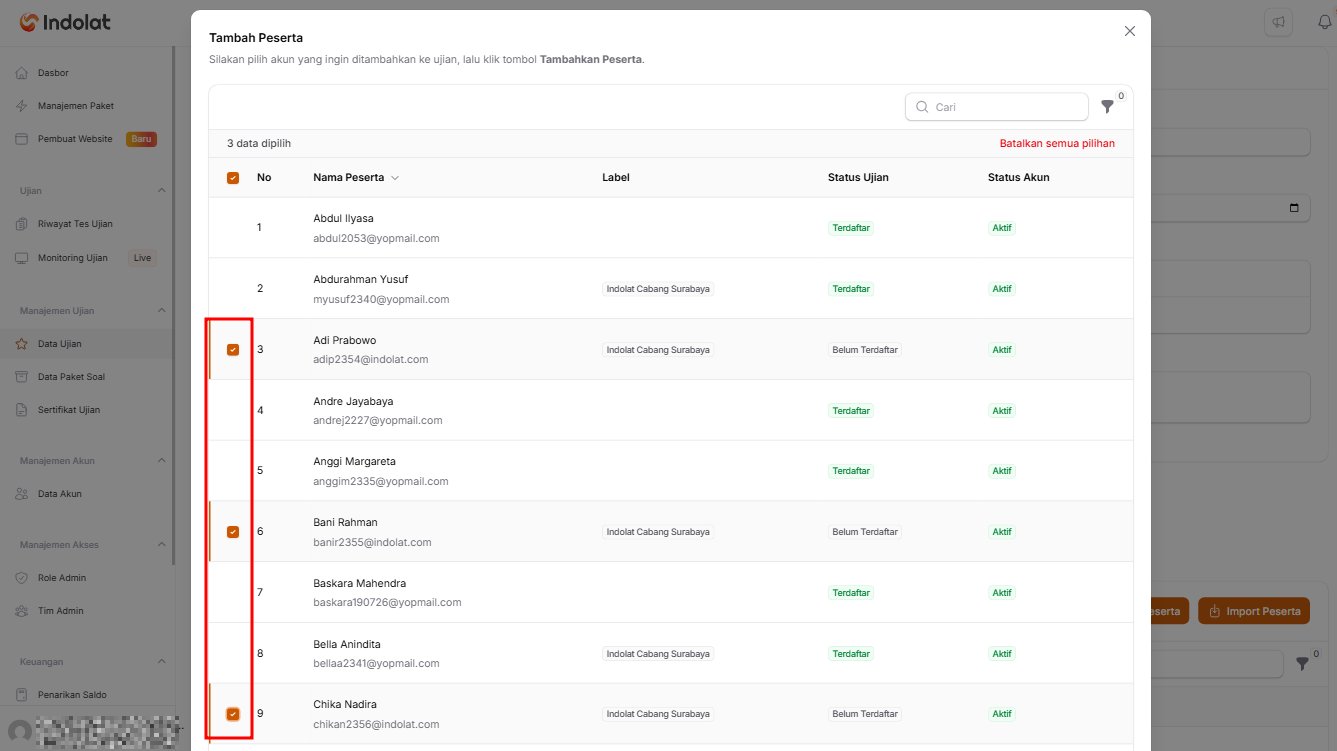
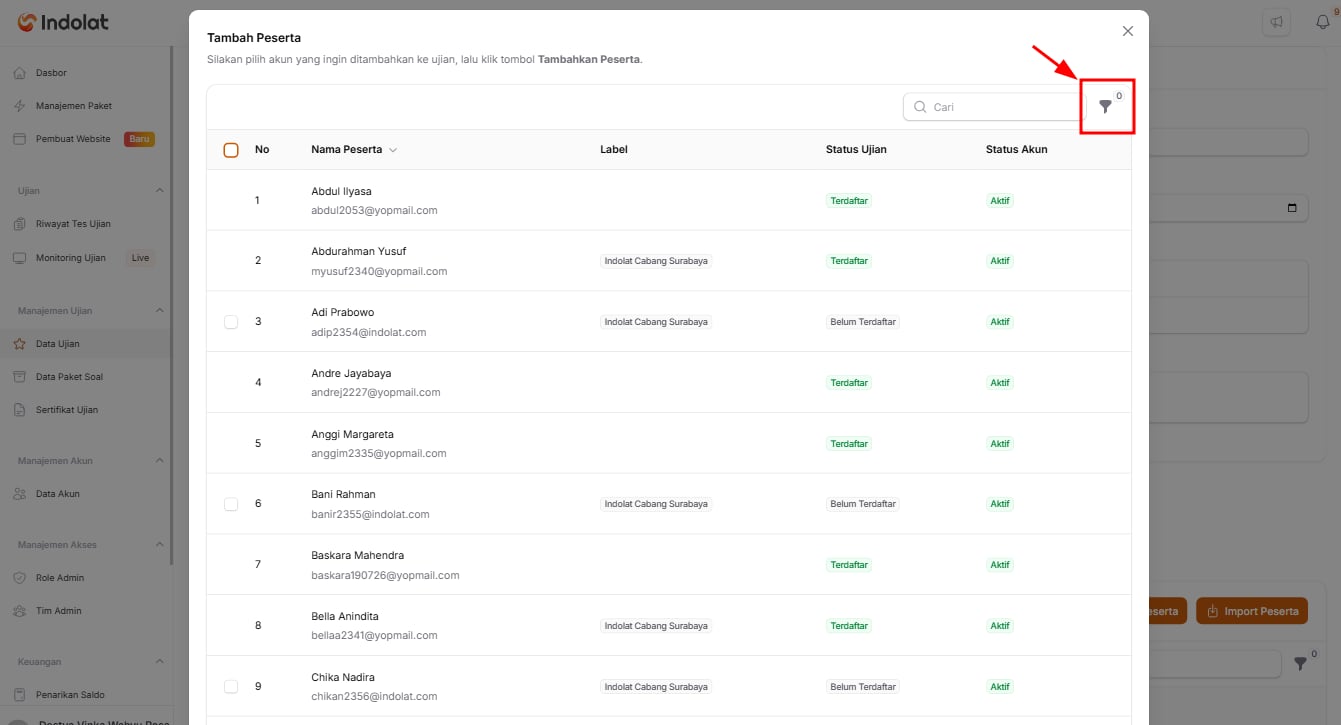
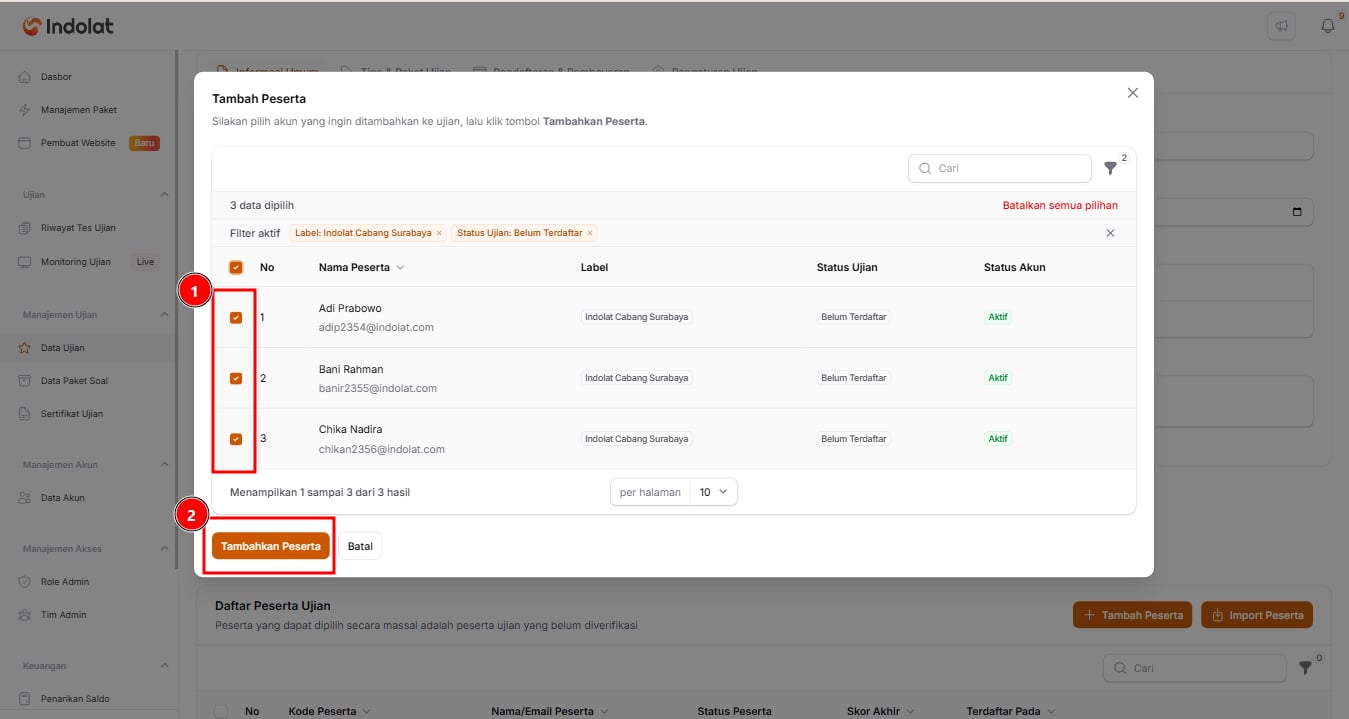
Choose Participants from the List
With the filter, you can narrow participants down by: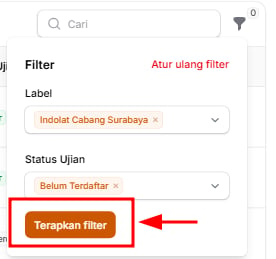
- Label, for example Indolat Cabang Surabaya (Indolat Surabaya Branch); and
- Exam Status: choose Not Registered to show only participants who haven’t been added to this exam yet.
8
Click Add Participants
Add Participants by Importing Exam Participants
Add Participants by Importing Exam Participants
Use this method if you already know which exam the participants will take.For example, you have a list of participants who will only take the SNBT 2027 Grand Tryout.
1
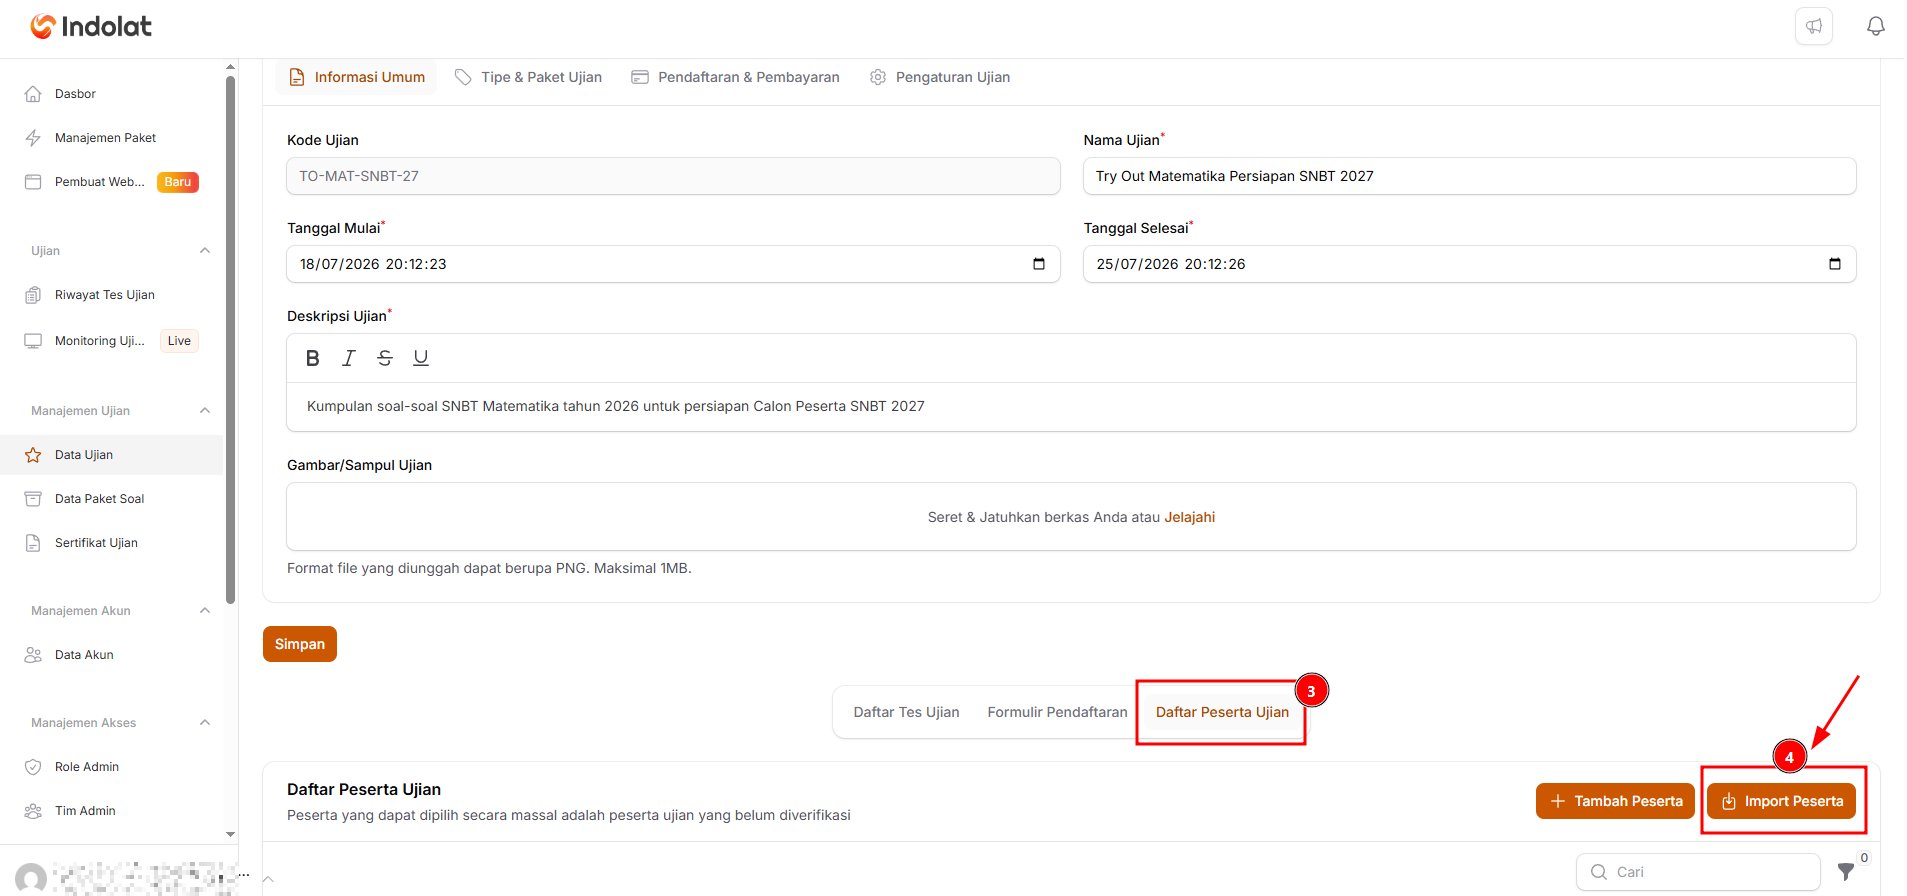
Click Import Participants
- Open the Exam Data menu and choose the exam the participants will take.
- Click Details.
- The system opens the details page. Go to the Exam Participant List section.
- Click Import Participants.
2
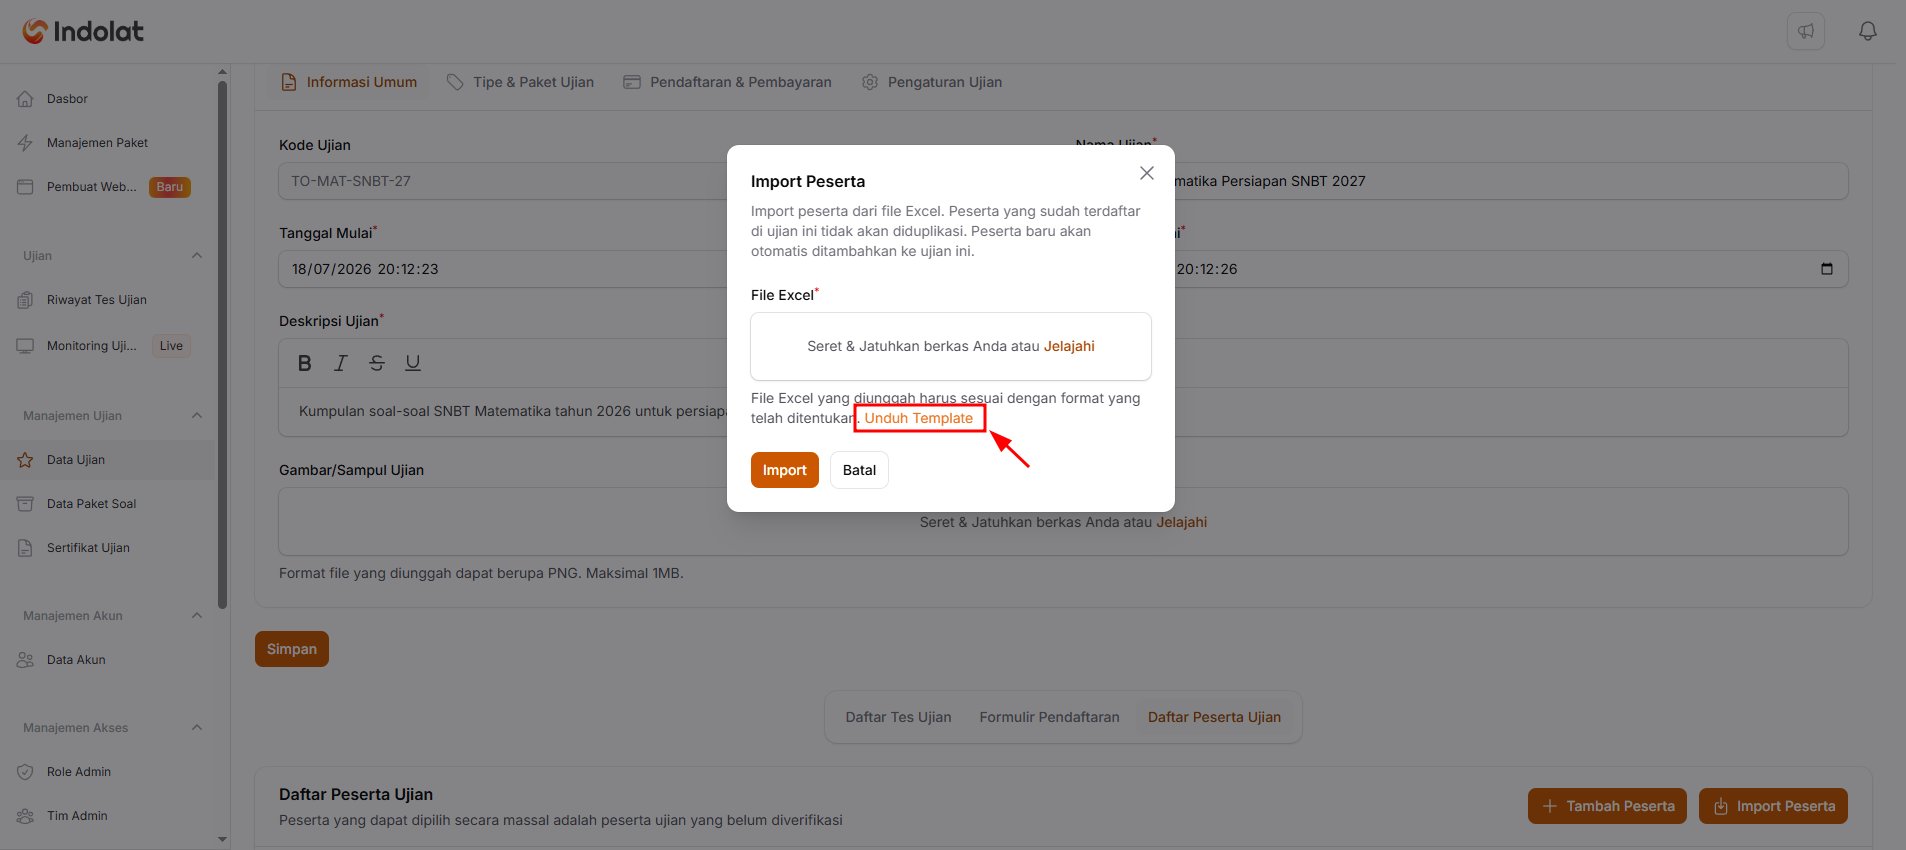
Download the Excel Template
3
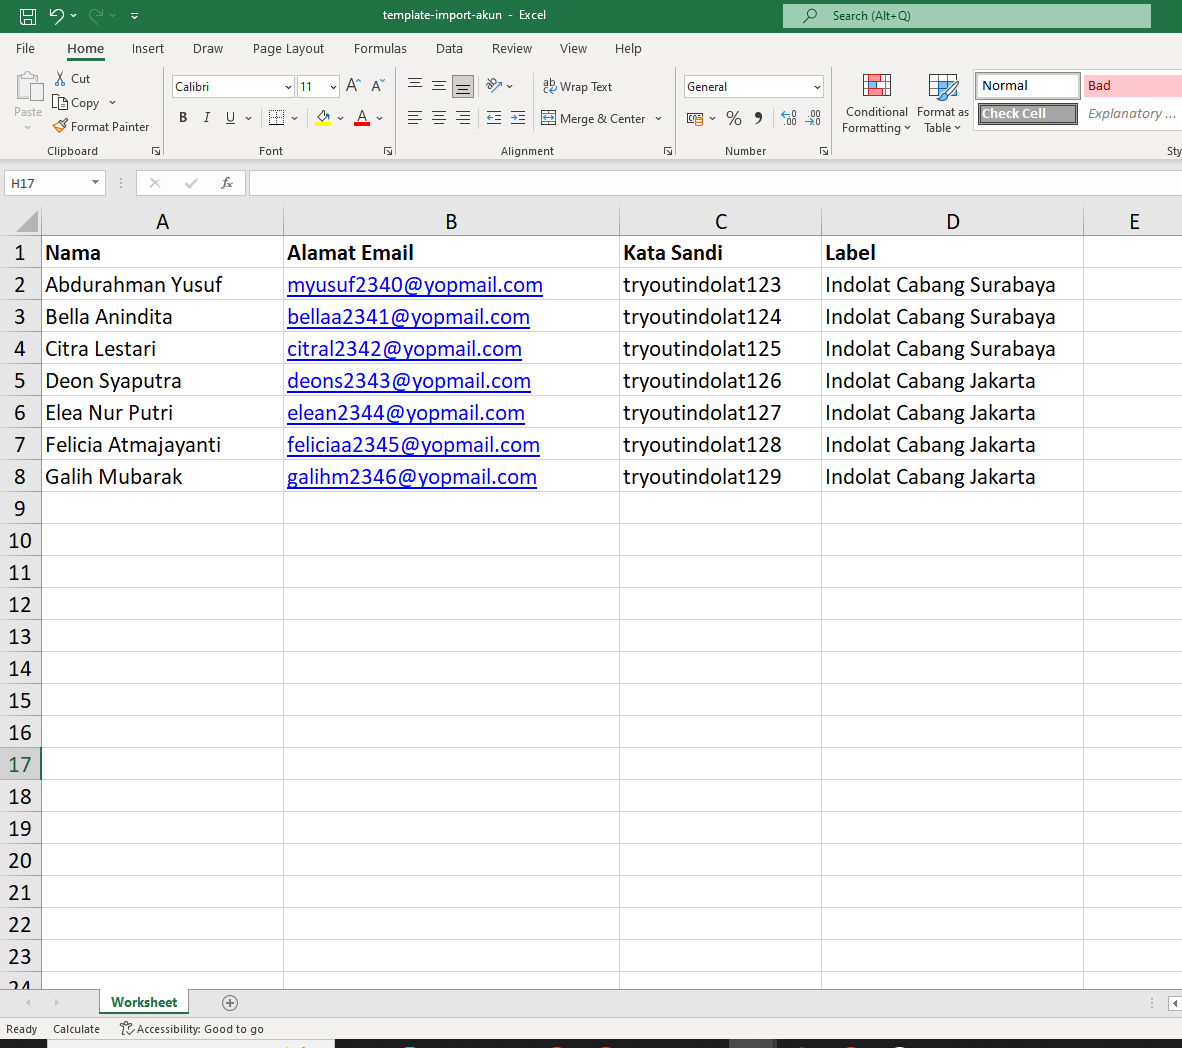
Fill In the Participant Data in the Import Template
- Name: enter the name of the participant who will take the exam.
- Email Address: enter the email the participant will use to log in.
- Password: enter a password for each participant.
- Label: a tag for grouping participants. This column can be left empty if you don’t need groups.
About email addressesDuring the import, the system doesn’t check whether an email address is actually active and valid. So admins can use email addresses created just for the exam, for example:
peserta001@indolat.compeserta002@indolat.com
4
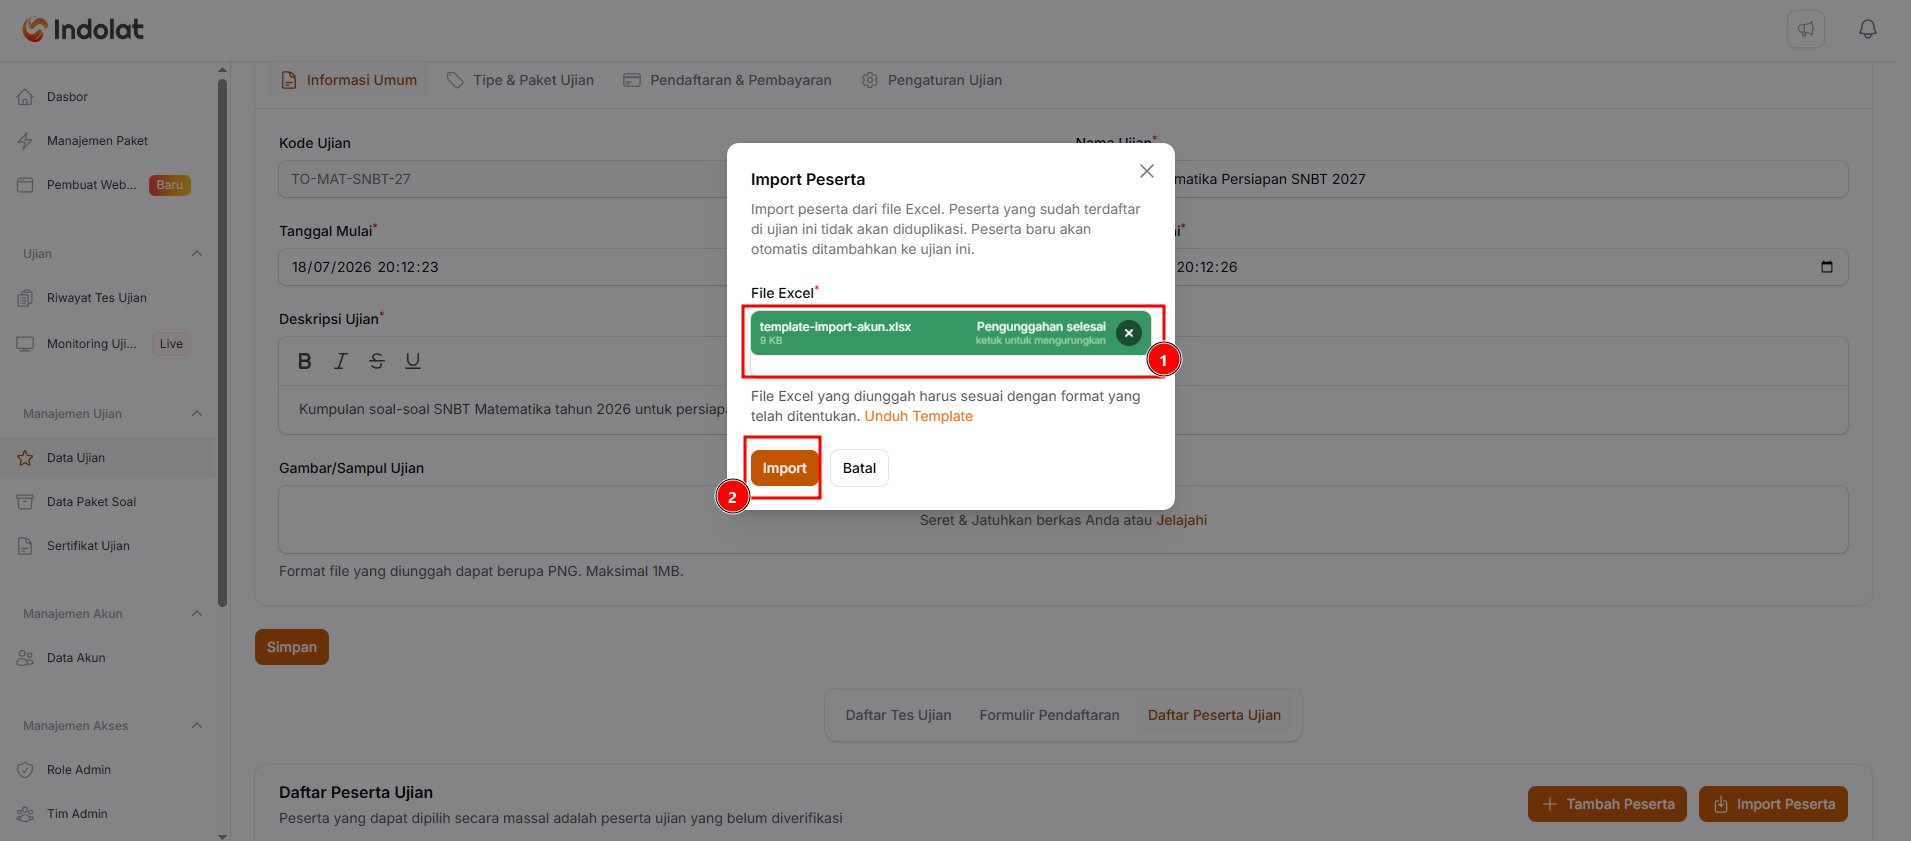
Upload the Import File
- Make sure the file name appears with the message Upload complete.
- Click Import.
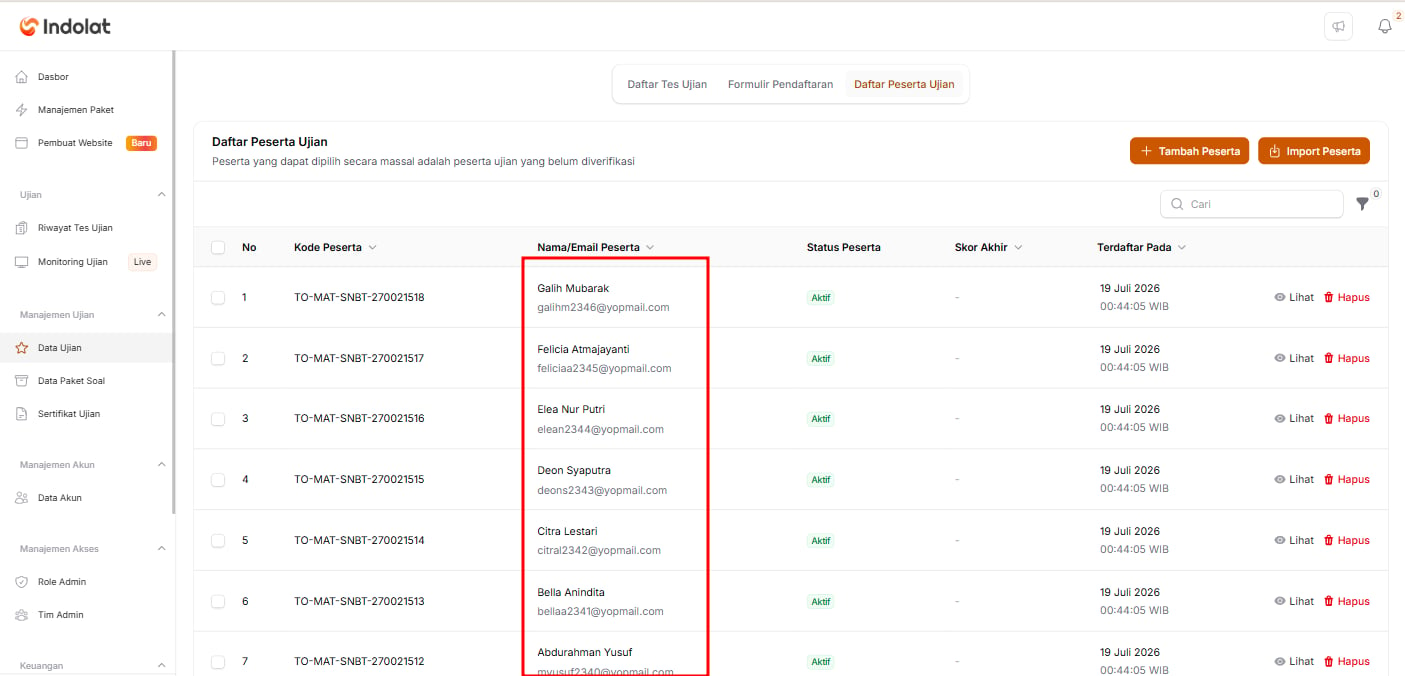
- The system automatically creates the participant accounts and adds them to the Exam Participant List. This runs in the background and you’ll get a notification when the import is done.